









I’ve spent eighteen years pulling half-dead vacuums out of people’s hallways in Bristol, and I’m telling you right now: your machine isn’t actually dead. Most folks see a lack of suction and immediately start looking up the price of a new upright, thinking the motor has finally given up the ghost. But more often than not, the only thing standing between you and a clean carpet is a bit of perished rubber. Learning how to replace a vacuum belt is usually the difference between a trip to the tip and a machine that runs like new again. It’s a five-pound fix that people treat like a death sentence for their appliances.
I’m not going to give you a manual full of technical jargon that makes your head spin. Instead, I’m going to show you exactly how to get under the hood, find that snapped or slipping belt, and swap it out without needing a degree in engineering. I’ll walk you through the bits you actually need to know, from unscrewing the brush roll to making sure the tension is just right. We’re going to save your vacuum and, more importantly, save your money.
Guide Overview
Tools & Supplies
- Screwdriver (to remove housing screws)
- Scissors or Utility knife (to cut away old, broken belt)
- Replacement vacuum belt (1 unit)
- Cleaning cloth (1 unit)
Step-by-Step Instructions
- 1. First thing you need to do is turn the machine off and unplug it from the wall. I don’t care how much of a hurry you’re in; I’ve seen enough people get a nasty jolt from a live brush roll to last a lifetime. Once it’s safe, flip the vacuum over onto its back on a flat surface, preferably something soft like a rug so you don’t scratch the casing.
- 2. You’ll need to get to the brush roll, which is usually tucked away under the floor nozzle. Depending on the model, you’ll either find a couple of screws holding the cover in place or a simple latch that snaps open. If it’s one of those modern ones that uses plastic clips, just be gentle—they can be a bit temperamental if you force them.
- 3. Once the cover is off, you’ll see the belt. It’s usually a black rubber loop wrapped around the brush roll and a small motor spindle. If the belt has snapped, you’ll see bits of it lying there; if it’s just slipped off, it’ll look like a tangled mess. Use your fingers to wiggle the old belt off the spindle first, then slide it off the brush roll.
- 4. Before you even think about putting a new belt on, take a good look at the brush roll itself. I’ve lost count of how many times I’ve opened a machine only to find the brush is completely choked with hair and carpet fibers. Use a pair of scissors to carefully snip away any hair or thread wrapped around the ends. If you don’t clean it now, that new belt won’t last a week.
- 5. Now, take your replacement belt—make sure it’s the right size, or you’re just wasting your time—and stretch it over the motor spindle first. It’s a bit of a fiddly job, much like trying to thread a needle when you’ve had a long day, but you just need to loop it around the spindle before you try to tackle the larger brush roll.
- 6. Once the belt is on the spindle, pull the brush roll into position so the belt catches in the grooves. You might need to rotate the brush by hand to help the belt seat itself properly. I always give it a few manual turns just to make sure everything is tracking straight and isn’t riding up the side of the roll.
- 7. Finally, pop the cover back on and tighten those screws down. Don’t go over the top of them, either; you don’t want to strip the plastic threads. Plug it back in, give it a quick test run, and if you hear a smooth whirring instead of a dying groan, you’ve done the job right.
Understanding How to Replace a Vacuum Belt

Before you go diving into the guts of the machine, you need to understand why this part fails in the first place. Most people call me because they’re panicking about a sudden vacuum suction power loss, thinking the motor has finally given up the ghost. Usually, it hasn’t. It’s just that a tiny bit of rubber has snapped or stretched so much it’s no longer doing its job. I’ve seen countless machines sitting in the scrap heap simply because a customer didn’t realize a five-pound piece of rubber was the culprit.
While you’ve got the base turned over, don’t just swap the belt and call it a day. Take a moment for some proper cleaning the brush roll while you’re in there. Hair, carpet fibers, and those little bits of grit love to wrap themselves around the spindle, creating drag that can actually snap a brand-new belt if you aren’t careful. If you want to get it right, learn how to check belt tension by giving it a light tug; it shouldn’t feel like a guitar string, but it shouldn’t be floppy either.
Key Things to Know
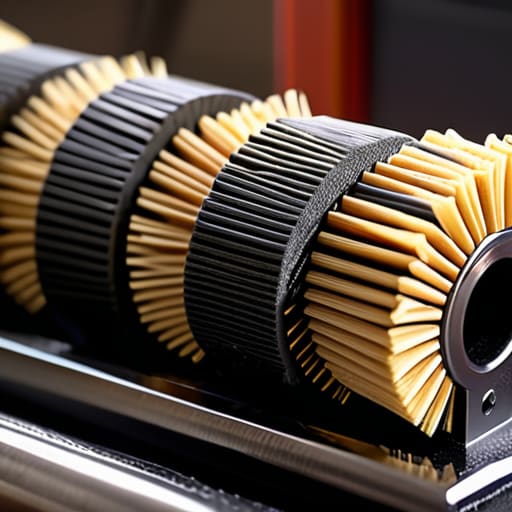
Before you go diving in with a screwdriver, you need to understand that a snapped belt isn’t always a death sentence for the machine. Most people see a sudden vacuum suction power loss and immediately assume the motor has given up the ghost. Usually, it’s just that little bit of rubber that’s finally perished or stretched too thin. While you’re in there, don’t just swap the part and close it up; take a moment for some proper cleaning the brush roll. If there’s a thick nest of hair or carpet fibres wrapped around the spindle, it’ll put unnecessary strain on the new belt and have it snapping again before you’ve even finished the hallway.
I also suggest a quick bit of how to check belt tension before you call it a day. A belt that’s too tight can burn out the motor, while one that’s too loose will just slip and spin aimlessly. It’s a bit of a balancing act, but if you get it right, that machine will feel brand new. Just remember: treat the machine with a bit of respect, and it’ll usually return the favour.
A few bits of advice from eighteen years under the brush bar
- Don’t go buying the first cheap belt you see on a discount site. They’re usually made of thin, recycled rubbish that snaps the second it hits a bit of resistance. Spend the extra couple of quid on a decent one; it’ll save you from opening the machine up again in three weeks.
- Before you even think about swapping the belt, give the brush roll a proper clean. If it’s choked with hair and carpet fibres, even a brand-new belt is going to struggle, and you’ll just end up burning the motor out.
- Check the tension. You want it snug, but don’t go pulling it like you’re playing tug-of-war. If it’s too tight, you’ll be putting unnecessary strain on the motor bearings, and that’s a much more expensive headache than a simple belt change.
- Keep a small tray or even an old jam jar nearby while you’re working. I’ve seen far too many people lose those tiny little screws into the carpet, and once they’re gone, you’re not getting the casing back on properly.
- When you’re fitting the new one, make sure it’s seated perfectly in the grooves. If it’s even slightly off-centre, it’ll slip, make a terrible screeching noise, and you’ll be right back where you started.
The Bottom Line
Most people think their vacuum has lost its suction or the motor has died, but nine times out of ten, it’s just a bit of perished rubber that needs swapping out.
Don’t go buying a brand-new machine just because the brush bar isn’t spinning; check the belt first, and you’ll likely save yourself a few hundred quid.
When you’re picking up a replacement, make sure you actually check the model number on the sticker—a belt that looks right isn’t always the right fit.
Don't Bin It Just Yet
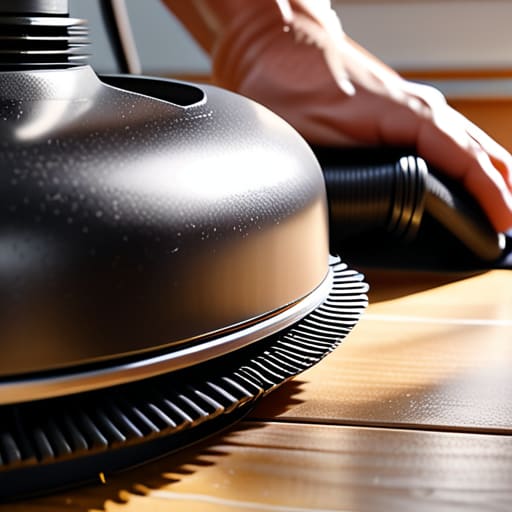
At the end of the day, replacing a vacuum belt is one of those small, annoying jobs that most people avoid by simply deciding the whole machine is knackered. You’ve checked the brush roll for tangled hair, you’ve matched the part number correctly, and you’ve actually taken the time to seat the belt properly around the motor spindle. It isn’t rocket science, but it does require a bit of patience and a steady hand. Just remember that a bit of preventative maintenance—like checking the belt for fraying before it actually snaps—will save you a lot of frustration and a much more expensive trip to the shops later on.
I’ve spent nearly two decades looking at the insides of machines, and the biggest tragedy I see isn’t a faulty motor or a burnt-out circuit board; it’s the sheer amount of perfectly good hardware sitting in landfills because of a five-pound piece of rubber. There is a real, quiet satisfaction in taking something that felt useless and making it hum back to life with just a bit of elbow grease. So, don’t let a bit of dust and a snapped belt get the better of you. Fix it, keep it running, and give that machine another few years of hard work.
Frequently Asked Questions
How do I know if it's actually the belt that's gone and not the motor itself?
It’s the question I get most often. Here’s the trick: if you turn the vacuum on and hear the motor whirring away like nothing’s wrong, but the brush bar isn’t spinning, it’s almost certainly the belt. If the motor makes a horrible, grinding, or high-pitched screaming noise, then you’ve likely got a bearing or motor issue. A snapped belt is a five-pound fix; a dead motor is a write-off. Check the belt first.
Can I just use a regular piece of rubber or a different brand's belt if I can't find the exact match?
Look, I’ve seen people try to rig a vacuum with a bit of garden tubing or a random rubber band, and it never ends well. You might get it spinning for ten seconds, but then it’ll either snap or, worse, overheat the motor. If you can’t find the exact brand, find the exact specs. Check the length and thickness. A different brand’s belt is fine if the measurements match, but don’t get creative with “rubber.”
Is there a trick to getting the new belt onto the brush roll without it slipping off or snapping?
It’s a bit of a fiddly business, isn’t it? The trick is to stop fighting the tension. Don’t try to stretch it over the whole roll at once. Instead, loop it around the motor spindle first, then hook it onto one end of the brush roll. Once it’s seated, use your thumb to guide the rest of the belt around the roller. It’ll want to pop off, but just keep steady.
