









I’ve spent eighteen years pulling the guts out of machines in Bristol, and I’m telling you right now: most people think a vacuum is “broken” when it’s actually just suffocating. I once had a customer lug a perfectly good upright to my workshop, swearing the motor had died, only for me to find a filter so choked with grey silt it looked like a piece of felt. They’d spent hundreds on a new machine when they really just needed to learn how to clean a vacuum filter properly instead of just banging it against the bin. It’s a waste of money, and frankly, it’s a waste of a good appliance.
I’m not going to give you any of that glossy, manufacturer-approved nonsense that involves buying expensive replacement parts you don’t actually need. I’m going to show you the real way to do it—the way that actually restores suction without ruining the delicate mesh. We’ll go over exactly what you can rinse under a tap, what needs a dry brush, and most importantly, the one mistake that will permanently kill your motor if you aren’t careful.
Guide Overview
Tools & Supplies
- Soft brush or old toothbrush (for loosening debris)
- Hairdryer or fan (for accelerating drying process)
- Lukewarm water (enough to rinse filter)
- Mild dish soap (small amount if filter is greasy)
Step-by-Step Instructions
- 1. First thing you need to do is find the filter. Don’t just yank at the plastic casing; most of these machines have a little latch or a twist-lock that you need to engage properly. Once you’ve got it out, take a good look at it before you touch a drop of water. If it’s a paper-style filter that looks like a pleated accordion, leave it alone—you can’t wash those, and trying to will just turn it into a useless lump of wet mush.
- 2. If it is a foam or washable fabric filter, take it outside or over a bin. Give it a gentle tap against the side of the bin to knock out the loose grit and the heavy dust. I’ve seen people try to vacuum the filter itself, but that usually just ends up clogging the machine’s intake even worse. You want to get the bulk of the nastiness out dry before things get messy.
- 3. Now, get a bowl of lukewarm water. Don’t go using boiling water or harsh detergents; you’ll just degrade the material and it won’t hold a shape anymore. Submerge the filter and give it a very light squeeze. You aren’t scrubbing it like a kitchen floor; you’re just encouraging the dust to let go of the fibers. If the water turns black, dump it, get fresh water, and repeat the process until it runs clear.
- 4. Once the water is running clean, give it one final rinse with cold water. This helps settle the fibers back down. Now, here is the part where most people mess up: you have to get the excess moisture out. Squeeze it firmly between your palms, but don’t wring it like a tea towel or you’ll tear the structure. You want it to be damp, not dripping.
- 5. This is the most important bit, so listen close: you must let it dry completely. I cannot tell you how many times I’ve seen someone pop a damp filter back into a vacuum, only to smell burning plastic ten minutes later. That moisture gets sucked straight into the motor and fries the electronics. Lay it out on a towel in a well-ventilated spot—or near a radiator if you’re in a rush—and do not touch it until it is bone dry.
- 6. While you’re waiting for that to dry, take a moment to check the rest of the machine. Check the hose for any trapped coins or rogue Lego bricks, and make sure the dust canister is wiped clean of any fine silt. It’s much easier to prevent a clog now than it is to explain to a customer why their motor has just given up the ghost.
- 7. Once that filter is as dry as a bone, pop it back into its housing. Make sure it sits flush; if it’s even slightly crooked, you’re just sucking dirt straight into the engine. Give it a quick test run without any attachments first to make sure the suction feels right and the machine sounds healthy.
Understanding How to Clean a Vacuum Filter Properly
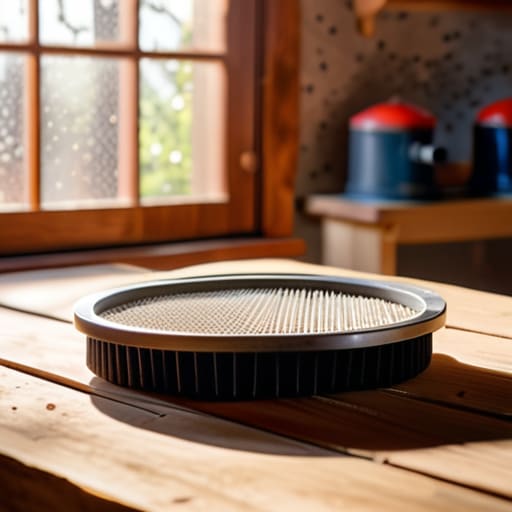
Now, don’t just go scrubbing away without a bit of sense. The biggest mistake I see—and I’ve seen it a thousand times on my workbench—is people trying to rush the process. If you wash a filter and shove it back in while it’s even slightly damp, you aren’t just cleaning; you’re essentially making a paste of dust and water that will choke the life out of your machine. Most people underestimate how long to dry vacuum filters actually need; I always tell folks to give it a full twenty-four hours in a warm, airy spot. If it feels even a bit clammy, leave it alone.
It isn’t just about getting the dirt out, either. It’s about preventing vacuum motor overheating. When that filter is clogged, the motor has to work twice as hard to pull air through, and that extra strain is what eventually kills the machine. If you notice a sudden vacuum suction power loss, don’t assume the motor is dying. Usually, it’s just a cry for help from a filter that’s seen better days. Treat the airflow right, and the machine will treat you right.
Key Things to Know

One thing people always miss is that a dirty filter isn’t just about dust; it’s about the strain you’re putting on the machine. When you notice a sudden vacuum suction power loss, your first instinct might be to check the nozzle for a stuck coin or a clump of hair. But more often than not, the machine is just gasping for air. If that airflow is restricted, the motor has to work twice as hard to do half the job, which is the fastest way to end up with preventing vacuum motor overheating issues that turn a simple cleaning job into a costly replacement.
You also need to be smart about the drying process. I’ve seen plenty of folks rush this, putting a damp filter straight back into the machine because they’re in a hurry. Don’t do it. If there’s even a hint of moisture left, you’re basically inviting mould to grow right inside your motor housing. When it comes to how long to dry vacuum filters, my rule is simple: if you think it’s dry, give it another six hours. It’s better to lose a bit of cleaning time than to ruin the whole unit.
Five things I wish people would do before they call me out
- Stop trying to dry it with a hairdryer; you’ll warp the material and make it useless, so just leave it on a radiator or near a window for a full day.
- Check the seal around the filter every single time you put it back in, because if it isn’t seated perfectly, dust gets straight into the motor and that’s a much more expensive repair.
- Don’t just rinse the surface and call it a day; you need to tap it gently against the side of the sink to get the grit out of the deep folds where the real blockage lives.
- If you’re using a sponge or a cloth to wipe it, be careful not to tear the mesh, or you’ve essentially turned your vacuum into a very loud, very expensive fan.
- Keep an eye on the colour; once a filter starts looking grey and stays that way even after a good scrub, it’s time to stop cleaning it and just buy a replacement.
The bottom line
Stop waiting for the suction to drop to zero; if the filter looks grey, it’s already doing too much work and costing you motor life.
Check the manual before you dunk anything in water, because some of those fancy HEPA filters will be ruined the second they get damp.
Air must be able to flow freely, so if you’re skipping the cleaning, you’re basically just turning your expensive vacuum into a very loud, very heavy paperweight.
Don't Toss It Just Yet

Look, it really isn’t that complicated. You just need to remember that a vacuum is only as good as its ability to breathe. If you’ve followed what I’ve said—checking the type of filter you’ve got, rinsing it under a lukewarm tap without using any harsh soaps, and, most importantly, letting it dry completely before you shove it back in—you’ve already done more than most people. Most of the “broken” machines I see on the scrap heap could have been saved by twenty minutes of patience and a bit of airflow. Don’t let a bit of dust turn into a burnt-out motor just because you were too rushed to let a piece of foam sit on the windowsill for a day.
At the end of the day, I hate seeing good kit end up in a landfill. It’s a waste of money and a waste of perfectly good engineering. Every time you take five minutes to maintain what you already own, you’re pushing back against that culture of just buying a new one the second something feels a bit sluggish. There is a real, quiet satisfaction in hearing a vacuum hum properly again because you actually looked after it. Keep your tools clean, keep your filters clear, and you’ll find your appliances will stay with you a lot longer than the manufacturer’s warranty suggests.
Frequently Asked Questions
Can I just throw the filter in the dishwasher to save time, or is that going to melt the frame?
Don’t you dare. I’ve seen enough warped plastic to know that the dishwasher is a death sentence for most filters. Even if the frame doesn’t melt instantly, the high heat and those aggressive detergents will shred the delicate fibers that actually do the work. You’ll end up with a useless piece of plastic that lets dust straight into the motor. Just use a tap and some lukewarm water; it takes two minutes.
How do I know when the filter is actually dead and needs replacing instead of just a good wash?
Look, there’s a difference between a dirty filter and a ruined one. If you’ve washed it, let it dry completely, and you’re still seeing dust clouds or smelling that burnt-motor scent, it’s done. If the material feels thin, or if you see tiny holes in the fabric that weren’t there before, stop wasting your time. Once the structural integrity is gone, it’s just a sieve, and it’ll kill your motor. Just buy the replacement.
If I clean it but the suction still feels rubbish, is it the filter or is something else stuck in the pipes?
If you’ve scrubbed the filter and it’s bone dry, but the suction is still rubbish, you’ve likely got a blockage further up the line. I’ve seen it a hundred times: a stray sock, a clump of hair, or a coin wedged in the hose. Grab a broom handle or a torch and check the wand and the pipes. If the air isn’t moving, something’s physically stopping it, not just a dirty filter.
