









I was standing in a damp kitchen in Bedminster last Tuesday, staring at a washing machine that looked perfectly fine on the outside but was producing nothing but lukewarm water. The customer was already halfway through ordering a brand-new, top-of-the-line model online because she thought the whole machine was a write-off. It’s a joke, really. Most people assume a cold wash means the guts of the machine are shot, but before you go spending hundreds of pounds on a replacement, you need to understand how to test a heating element properly. Usually, it’s just a bit of limescale or a single burnt-out coil, not a reason to send a perfectly good appliance to the landfill.
I’m not going to give you any of that fancy, textbook jargon that makes your head spin. Instead, I’m going to show you exactly how I do it in my own workshop. We’ll walk through grabbing your multimeter, checking for continuity, and making sure you aren’t wasting your time chasing ghosts in the wiring. By the time we’re done, you’ll know if that element is actually dead or if it’s just playing hard to get.
Guide Overview
Tools & Supplies
- Multimeter for measuring resistance and continuity
- Screwdriver set for accessing the element
- Replacement heating element (if testing confirms failure)
- Work gloves for safety and handling
Step-by-Step Instructions
- 1. First things first, you’ve got to cut the power. I don’t care if you think you’ve turned the machine off at the dial; you need to pull the plug straight out of the wall or flip the breaker. I’ve seen too many people get a nasty shock because they assumed a machine was dead just because it wasn’t running.
- 2. Once you’re sure the electricity is gone, you need to get to the element. On most washing machines, this means you’ll be working from the back, but on some models, you might have to tip the machine forward or remove the front panel. It’s usually a big, metal component tucked down near the bottom of the drum. Just take your time and don’t force anything; if a screw feels stuck, give it a bit of WD40 rather than stripping the head.
- 3. Now, locate the two wires connected to the element. These are usually held on by spade connectors. Gently pull them off—and I mean gently—to expose the two terminals on the element itself. If the wires look charred or brittle, that’s a sign of a bigger problem, but for now, we just want to get a clear reading on the element.
- 4. Grab your multimeter and set it to the ohms (Ω) setting. If your meter isn’t auto-ranging, set it to the lowest resistance scale. You’re looking for a specific number here. I’ve pulled apart enough heaters to know that a healthy element should show a reading somewhere between 10 and 30 ohms. If the screen stays at infinity or “OL,” then the circuit is broken and the element is definitely toast.
- 5. Next, you need to check for a “ground fault,” which is a fancy way of saying the electricity is leaking where it shouldn’t. Set your multimeter to the highest resistance setting or the continuity mode. Touch one probe to one of the element terminals and the other probe to the metal casing of the machine itself. If you get any reading at all here, the element is shorted to the frame and needs to be replaced immediately. It should show nothing but an open circuit.
- 6. If your readings look good, double-check your connections before you put everything back together. Sometimes it isn’t a broken element at all, but just a loose wire or a bit of corrosion on the terminal that’s stopping the heat from kicking in. I’ve saved more machines by simply cleaning a terminal with a bit of sandpaper than I have by replacing parts.
- 7. Finally, reassemble the machine, making sure those wires are pushed firmly back onto the terminals. Give them a tiny tug to ensure they’re seated properly before you screw the panels back on. Plug it back in, run a short cycle, and see if that water actually gets warm.
Understanding How to Test a Heating Element
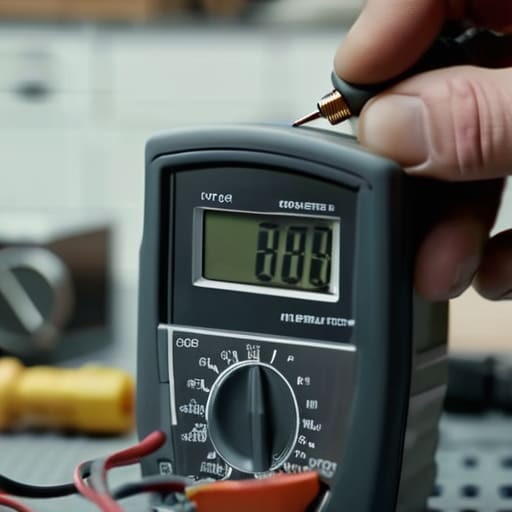
Before you start poking around with your tools, you need to understand what you’re actually looking for. Most people call me because their clothes are coming out of the wash stone cold, assuming the whole machine is knackered. Usually, it’s just a matter of oven heating element troubleshooting logic applied to a washing machine—it’s a simple circuit that’s been interrupted. When you’re looking at the component, you aren’t just checking if it looks burnt; you’re looking for the invisible break.
When you finally get your meter out, pay close attention to your multimeter settings for resistance. You aren’t looking for a “yes” or “no” answer like a light switch; you’re looking for a specific number. If the screen stays at ‘OL’ or shows infinity, the internal wire has snapped. If you see a reading that looks like a normal range (usually between 20 and 50 ohms for most domestic elements), then the element itself is likely fine, and your problem is probably a faulty thermostat or a control board acting up. Don’t jump to conclusions until you’ve seen that number.
Key Things to Know
Before you go poking around with your tools, there are a few things I’ve learned from eighteen years of pulling these things apart. First off, don’t go jumping straight to the element. Half the time, it’s just a blown thermal fuse or a dodgy control board causing the headache. If you’re doing oven heating element troubleshooting, make sure you’ve actually ruled out the easy stuff first. And for heaven’s sake, unplug the machine. I’ve seen too many people try to be clever and end up with a nasty shock, and no repair is worth a trip to the hospital.
When you do get down to the actual testing, pay attention to your multimeter settings for resistance. You aren’t looking for a simple “on or off” here; you’re looking for a specific range. If your ohmmeter reading heating element shows zero or infinity, you’ve found your culprit. I also always keep an eye out for checking heating element for shorts against the metal casing. If that element is leaking electricity where it shouldn’t, it’ll trip your breakers every single time.
A few things I’ve learned from eighteen years of pulling them apart
- Don’t go buying a new element the second your clothes come out cold. Half the time, it’s just a faulty thermostat or a tripped sensor telling the machine the water is already hot when it isn’t.
- Safety isn’t just a suggestion—unplug the machine. I’ve seen too many people try to “test” things while the power is live, and there’s no sense in getting a shock just to see if a bit of wire is working.
- If you see any white, crusty buildup around the element, don’t just assume it’s dead. Sometimes a thick layer of limescale acts like a blanket, insulating the heat so much that the machine’s sensors think it’s not working.
- Check your connections before you check the part. I can’t tell you how many times I’ve opened a machine only to find a wire has simply vibrated loose from its terminal. It’s a five-second fix that saves you a fifty-pound part.
- When you’re using your multimeter, make sure you’re actually getting a reading on the resistance. If the screen stays at zero or shows “OL,” that element is toast, but if you get a steady number, it’s likely fine and the problem lies elsewhere.
The bottom line
Don’t go buying a new heating element the moment your clothes come out cold; half the time it’s just a tripped sensor or a bit of limescale playing tricks on you.
A multimeter is your best friend here—stop guessing and actually check the continuity, otherwise you’re just throwing money at a problem that might not even be there.
Safety isn’t optional—unplug the machine and let it cool down before you start poking around, because a live element is a nasty way to end your afternoon.
Don't Toss It Just Yet

At the end of the day, testing that element is about more than just checking a number on a screen; it’s about making sure you aren’t throwing money down the drain. You’ve checked the continuity, you’ve verified the resistance, and you’ve confirmed that the power is actually reaching the component. If that reading comes back as an open circuit, then yes, you’ve found your culprit. But before you go clicking ‘buy’ on a brand-new part, just double-check that your connections aren’t simply loose or corroded. Most of the time, it’s the simplest things that trip people up, and a bit of patience with your multimeter will save you a massive headache.
I’ve spent eighteen years looking at machines that people were ready to send to the landfill, only to find out they just needed a bit of attention and a steady hand. There is a real, quiet satisfaction in fixing something yourself rather than just replacing it with a shiny new version that’ll probably end up in the same place in five years. Don’t let a little bit of technical uncertainty stop you from taking control of your own kit. Once you realize that these machines aren’t magic—they’re just clever bits of engineering that occasionally need a nudge—you’ll start seeing them in a whole new light.
Frequently Asked Questions
If my multimeter shows the element is fine, could the problem actually be the thermostat or the control board instead?
Absolutely. I’ve seen it a hundred times. You spend an hour testing the element only to find it’s perfectly healthy, but the machine still won’t heat. If your element’s got continuity, your next stop is the thermostat or the control board. The thermostat might not be telling the element to wake up, or the board might not be sending the signal at all. Don’t get discouraged; you’re just narrowing down the culprit.
Is it worth trying to clean the element if it's covered in limescale, or is that just a waste of time?
It’s worth a go, provided you aren’t looking at a chunk of calcified stone. If it’s just a light coating, a soak in some decent descaler or even white vinegar can work wonders. But if that scale is thick enough to crack an egg on, leave it be. At that point, the heat isn’t transferring properly, and you’re just asking for the element to burn out. Sometimes, it’s better to just swap it.
How do I know if the heating element has actually failed or if it's just a blown fuse in the plug?
Look, don’t go tearing the machine apart just yet. If the whole thing is dead—no lights, no sound, nothing—it’s likely that fuse in the plug or a tripped breaker. But if the machine runs, fills with water, and spins, but the water stays ice-cold? That’s your heating element. A blown fuse kills the power; a dead element just stops the heat. Test the plug first, then grab your multimeter for the element.
