








You think your oven is dying because the heating element is shot or the thermostat is on the blink, but I’ll bet my best cast iron skillet that’s not the problem at all. Most of the time, you’re just watching your money evaporate right through the cracks in the door. I’ve spent eighteen years pulling apart machines in Bristol, and I can’t tell you how many people call me out because they’re terrified of learning how to replace an oven door seal themselves. They think it’s some high-level electrical job, but honestly, it’s usually just a bit of perished rubber that’s been stubbornly clinging on long after it should have been binned.
I’m not here to give you a lecture or a manual written by someone who’s never actually held a screwdriver. What I’m going to show you is the straight, no-nonsense way to get that old, raggedy gasket out and the new one seated perfectly so your kitchen stops feeling like a sauna. We’ll go through the actual tools you need, how to spot the right part so you don’t waste a penny, and the one little trick I use to make sure that seal stays put.
Guide Overview
Tools & Supplies
- Screwdriver (Phillips or flathead depending on model)
- Needle-nose pliers (to grip or pull old seal segments)
- Soft cloth (to clean the door frame area)
- Replacement oven door gasket (1 unit)
- Mild detergent (small amount for cleaning)
Step-by-Step Instructions
- 1. First thing you need to do is make sure the oven is completely cold. I’ve seen plenty of people try to rush this while the heating elements are still warm, and let me tell you, that’s a quick way to end up with a nasty burn or a melted new seal. Once it’s cool, clear the area around the oven so you aren’t tripping over anything while you’re leaning in.
- 2. Get a good screwdriver ready—usually a flathead or a Phillips depending on what brand you’ve got—and start by removing the door. Most modern ovens have little clips or hinges you can release, but don’t go forcing anything. If it feels stuck, you’ve likely missed a screw tucked away near the bottom or the side. I always keep a small tray nearby to hold the screws, because losing a tiny screw in a kitchen floor crack is a headache you don’t need.
- 3. Now, you need to strip the old, ragged seal away from the oven frame. It might be held in by a metal retaining clip or it might just be tucked into a little groove. If it’s a clip, use your screwdriver to gently pry it loose. If it’s the type that just sits in a channel, you can usually just pull it out with your fingers. Try not to go too wild with the tool; you don’t want to dent the metal frame while you’re working.
- 4. This is the bit most people skip, but it’s the most important: clean the channel. Once the old seal is out, you’ll likely find a buildup of grease, crumbs, and burnt-on gunk sitting right where the new seal needs to go. Take a damp cloth with a bit of degreaser and wipe that groove until it’s spotless. If you try to seat a new seal on top of old grease, it won’t stay put, and you’ll be right back where you started.
- 5. Take your new seal and start feeding it into the groove, beginning at the bottom or a corner. I find it’s easiest to work your way around, pressing it in firmly as you go. If it’s a clip-in style, make sure the seal is seated deep enough before you snap the metal strip back over the top. You want it to look neat and even; if it’s bulging in one spot, something is wrong.
- 6. Before you go putting the door back on, do a quick visual inspection. Run your finger along the length of the new seal to make sure there are no gaps or kinks. If it looks good, lift the door back onto the hinges, line it up, and secure it. Once it’s all back together, close the door and give it a little wiggle to make sure it’s sitting flush against the frame.
Understanding How to Replace an Oven Door Seal
Before you even pick up a screwdriver, you need to know if you’re actually dealing with a broken seal or just a dirty one. I’ve seen plenty of folks call me out for a “broken” oven, only to find a thick layer of congealed grease preventing a tight fit. Look for the obvious signs of a faulty oven seal, like visible cracks in the rubber or sections that feel stiff and brittle rather than springy. If you notice your oven taking ages to heat up or seeing weird temperature fluctuations while you’re mid-roast, that’s a dead giveaway that your heat is escaping into the kitchen instead of staying in the box.
If the rubber looks alright but the door still feels loose, you might need to get specific with how to measure oven door seal dimensions. Don’t just eyeball it; a millimetre off can mean the difference between a perfect fit and a constant leak. You won’t need a massive workshop for this, but having a decent pair of needle-nose pliers and a flat-head screwdriver will make the job much less of a headache. It’s a bit of energy efficient oven maintenance that pays for itself in no time.
Key Things to Know
Before you start pulling things apart, you need to be sure it’s actually the seal causing your grief. I’ve seen plenty of people call out a repair technician because their oven isn’t heating right, only for us to find the heating element is shot. Watch out for oven temperature fluctuations caused by seal leaks; if your oven is constantly cycling or struggling to hit a steady temperature, that’s a massive red flag. Another tell-tale sign is seeing heat waves shimmering around the edges of the door or feeling a draft when you’re standing nearby. If the rubber feels brittle or looks like it’s been chewed by a dog, it’s time to bin it.
When you go to buy the replacement, don’t just guess. Most people think they can eyeball it, but you really need to know how to measure oven door seal dimensions accurately—specifically the thickness and the shape of the channel it sits in. If it’s a clip-in style, you won’t need much more than a flat-head screwdriver, but if it’s a groove-in type, you’ll want a bit of patience and maybe some soapy water to help it slide home.
A Few Bits of Advice Before You Get Stuck In
- Don’t just buy the cheapest seal you find online. I’ve seen plenty of people try to save a few quid on a generic part, only to find it’s too stiff to seat properly or it starts crumbling after three months of heat. Get the right one for your specific model.
- Check the grooves before you even think about fitting the new one. If there’s old bits of perished rubber or baked-on grease stuck in the channel, that new seal isn’t going to sit flush, and you’ll be right back where you started with heat leaking out.
- Give the new seal a bit of a stretch as you go. They can be a bit temperamental when they’re cold, but you want them tucked firmly into those corners. If it looks a bit loose or wavy, it’s probably not going to do its job.
- Clean the glass too. While you’ve got the door off or the seal out, wipe down the edges of the glass where it meets the frame. If there’s a layer of grime there, it’ll prevent a proper seal regardless of how new the rubber is.
- Test it with a bit of paper. Once you’ve got it all back together, close the door on a thin strip of paper. If you can pull it out with no resistance, your seal isn’t tight enough and you’ll need to check your seating again.
The Bottom Line
Don’t go buying a whole new oven just because the heat is escaping; most of the time, a bit of time and a new seal is all it takes to get it back to normal.
Check the fitment carefully when you’re tucking the new seal into the groove, because if it’s not seated right, you’re just wasting electricity and cooking time.
Keep an eye on the door hinges while you’ve got the seal off, as a wonky door is often the real reason the old gasket gave up the ghost in the first place.
Before You Close the Door
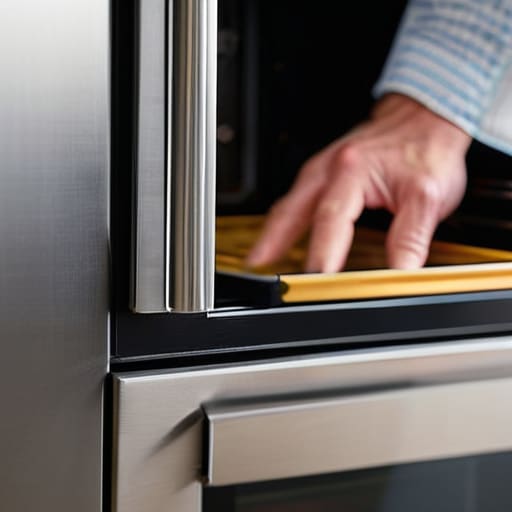
At the end of the day, replacing that seal is a straightforward bit of kit if you’ve taken the time to clean the edges and make sure the new gasket is seated properly. Don’t just shove it in and hope for the best; give it a firm press all the way around so it’s actually doing its job. You’ve dealt with the mess, you’ve swapped the part, and you’ve saved yourself the headache of a lukewarm oven and a skyrocketing electric bill. Just remember that most of the “broken” appliances I see in my van are really just machines that were neglected for a few months too long.
It might feel a bit daunting to get your hands dirty and pull something apart, but there’s a real satisfaction in knowing you didn’t just call a technician to charge you a call-out fee for a ten-minute job. There’s a whole world of stuff in your kitchen that’s built to last, provided you’re willing to get stuck in when things start to wear down. Once you realize that a bit of rubber and a bit of patience can bring a machine back to life, you stop seeing junk and start seeing things worth fixing. Now, go on and get that oven back to temperature.
Frequently Asked Questions
Do I really need to replace the whole thing if it's just a small tear in one corner?
Look, I’ve seen it a thousand times. You see a tiny nick in the corner and think you’ve dodged a bullet. If it’s just a small tear and the seal still sits flush against the frame without letting heat escape, you might get away with it for a bit. But honestly? Heat is relentless. That little tear will grow, your oven will start acting temperamental, and you’ll end up wasting money on electricity. Just swap it.
How do I know if it's actually the seal causing my oven to cook unevenly or if it's something else entirely?
Look, don’t go blaming the seal just because your tray is burning on one side. If you can see heat escaping—like a little shimmering wave around the door—or if the glass feels scorching to the touch, then yeah, it’s the seal. But if the heat is steady and the door’s tight, check your element or your thermostat. I’ve seen plenty of people swap a perfectly good seal when the heating element was the real culprit.
Is there a trick to getting the new seal to stay seated properly without it popping out every time I shut the door?
Honestly, it’s a right nuisance when they keep popping out. The trick is to warm it up first. If the new seal is cold and stiff, it’s going to fight you. Grab a hairdryer and give it a bit of a blast until it’s supple, then press it firmly into the groove. If you’ve got a bit of silicone grease handy, a tiny smear on the edge helps it seat and stay put.
