








I’ve seen a thousand machines in my time, and most were fine—but a clogged or cracked spray arm is a fix you can handle yourself without calling out a technician to charge you a hundred quid just to show up. People see a few spots on their glasses and think the whole machine is on its last legs, but usually, it’s just a bit of limescale or a tiny crack in the plastic. Learning how to replace a dishwasher spray arm isn’t some high-level engineering feat; it’s a ten-minute job that most folks overcomplicate because they’re afraid of breaking something else.
I’m not going to give you any of that polished, manual-style nonsense that makes a simple task feel like a chore. I’ll show you exactly how to pop the old one out, check the holes for debris, and click the new one into place so it actually does its job. I’ve spent eighteen years pulling apart appliances in Bristol, and I promise you, once you see how easy this is, you’ll never feel the need to buy a new dishwasher just because the water isn’t hitting the plates right.
Guide Overview
Tools & Supplies
- Pliers (to remove debris or loosen clips)
- Flashlight (to inspect spray arm holes)
- Replacement spray arm (1 unit)
- Cleaning vinegar or white vinegar (small amount for cleaning housing)
Step-by-Step Instructions
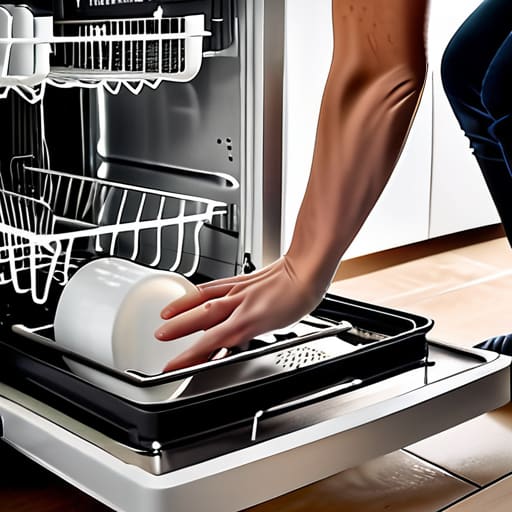
- 1. First things first, you need to clear everything out of the bottom of the machine. I can’t tell you how many times I’ve seen someone try to poke around in there only to knock a delicate glass over or slice their finger on a stray fork. Empty the dishwasher completely so you have a clear workspace and won’t be fishing for cutlery later.
- 2. Now, you’ll need to locate which arm is actually the problem. Most machines have a lower arm that sits on a central spindle and an upper arm that hangs from a spray rail. Reach in and give them a manual spin with your hand; if one feels stiff or gritty, that’s your culprit. If it’s the bottom one, you usually just need to lift it straight up and off the peg, though some older models might have a little plastic nut you’ll need to unscrew first.
- 3. If you’re dealing with the upper spray arm, it’s a bit more fiddly. You’ll have to slide the rack all the way out of the machine so you can get a proper grip on it. Look at the underside of the rack where the arm is attached; you’ll likely see a plastic clip or a threaded nut holding it in place. Don’t force it if it feels stuck, as those plastic threads can strip if you’re being too heavy-handed.
- 4. Once the old arm is off, take a good look at the holes. I’ve seen arms that look perfectly fine on the outside, but the tiny nozzles are so choked with lime scale and old food bits that the water can’t get through. Before you put the new one on, take a damp cloth and wipe down the spindle or the mounting point to make sure there isn’t any grit left behind that might prevent a smooth spin.
- 5. Now, take your replacement part—and make sure it’s the exact model for your machine, because “close enough” doesn’t work in appliance repair—and line it up with the mounting point. Press it down firmly until you hear a click, or screw the retaining nut back on until it’s snug. You want it tight enough to stay put during a heavy cycle, but don’t go at it with all your might or you’ll crack the housing.
- 6. Before you slide the rack back in and call it a day, give the arm another spin by hand. It should move freely and smoothly without any wobbling or catching. If it spins like it should, you’re good to go. Slide the rack back into the machine, run a short test cycle, and you’ll see that the water is actually hitting the plates again instead of just pooling at the bottom.
Understanding How to Replace a Dishwasher Spray Arm
Before you go ordering a new part, you ought to check if it’s actually broken or just stubborn. I’ve spent more time than I’d like to admit staring at plastic arms that weren’t actually snapped, just choked with debris. Common clogged spray arm symptoms usually involve spotting on your glassware or water pooling in the bottom of the tub because it simply isn’t reaching the dishes. If you see little bits of grit or seeds stuck in the holes, don’t rush to the shops. Sometimes a soak in white vinegar and a bit of poking with a toothpick is all it needs.
If the plastic is cracked or the spinning mechanism is shot, then you’re looking at a proper dishwasher parts replacement guide scenario. Most modern machines use a simple clip or a screw-on nut, but some older models can be a bit more temperamental. When you’re doing the installation, make sure the arm spins freely by hand before you shut the door. If it hits a rack tine or feels stiff, you’ve got a problem that’ll lead to more frustration down the line.
Key Things to Know
Before you go ordering a new part, you should really check if you actually need one. I’ve spent more time than I care to admit looking at machines that weren’t even broken—they were just choked with debris. One of the most common clogged spray arm symptoms is seeing water spots on your glasses or finding grit at the bottom of the tub. Often, it’s not a mechanical failure at all, but just a buildup of limescale or tiny food particles blocking the tiny holes. If you’ve got a moment, try how to clean dishwasher nozzles first by soaking the arm in a bit of white vinegar; you might save yourself the cost of a replacement entirely.
If you do find that the plastic has cracked or the spinning mechanism is shot, don’t panic. Most of these components are designed to be swapped out without needing a degree in engineering. When you’re looking at a dishwasher parts replacement guide, keep in mind that the connection point—whether it’s a simple friction fit or a screw-on nut—is where most people get stuck. Just make sure you have the exact model number handy before you buy anything. There’s nothing more frustrating than a part that looks identical but won’t click into place.
A few things I’ve learned from years of pulling these apart
- Don’t go buying a new arm until you’ve actually poked a straightened paperclip through the little holes. Half the time, it’s just a bit of dried pasta or a stray seed blocking the spray, not a broken part.
- Check the plastic nut or the clip that holds the arm in place. If that little bit of plastic has perished or cracked, a brand new arm won’t do you a lick of good because it’ll just wobble and spin uselessly.
- When you’re fitting the new one, make sure it sits flush. If it’s sitting slightly crooked, it’ll hit a plate or a bowl mid-cycle and you’ll end up with a machine that sounds like a drum kit falling down the stairs.
- Keep an eye on the spray arm at the bottom too, not just the one under the racks. People always focus on the one they can see easily, but the bottom one is usually the one doing the heavy lifting and the most clogging.
- If you’re replacing it because it’s cracked, take a quick look at your detergent. Using too much or the wrong kind can actually make the plastic brittle over time, which is why they snap in the first place.
The Bottom Line
Most of the time, you don’t actually need a new arm; you just need to clear out the gunk and seeds that have jammed the spray holes.
Don’t go calling a technician just yet—if the arm isn’t spinning, it’s usually a five-pound part and ten minutes of your time, not a broken machine.
Always check the clips and the threading when you’re putting it back together, because a loose arm is just as useless as a clogged one.
A Final Word Before You Close the Door
At the end of the day, replacing a spray arm is one of those small wins that makes a massive difference in how your kitchen runs. You’ve checked the clips, cleared out the old debris, and slotted the new part into place without needing to call out a technician and pay a call-out fee for something so simple. Just remember to double-check that the arm spins freely before you start a cycle, and make sure you haven’t left any stray bits of old plastic or grit in the sump. It’s a straightforward bit of maintenance, but it’s the difference between a machine that actually cleans and one that just moves soapy water around.
I know there’s a lot of pressure these days to just bin an appliance the moment it stops performing perfectly, but I’m telling you, don’t let them win. Most of the time, these machines aren’t “broken”—they’re just neglected. Taking twenty minutes to fix a spray arm or clear a filter keeps a perfectly good machine out of the landfill and keeps your hard-earned money in your own pocket. There’s a real satisfaction in knowing you’ve kept something running through your own two hands. It’s not just about the dishwasher; it’s about refusing to let a five-pound part dictate when a machine’s life is over.
Frequently Asked Questions
Do I really need to buy a whole new spray arm, or can I just clean the little holes out with a toothpick?
Look, I’ve spent eighteen years staring into the guts of machines, and I’ll tell you this: try the toothpick first. If it’s just limescale or a bit of stray grit, you can save yourself the cost of a new part. But if the plastic is cracked or the spinning mechanism is shot, no amount of poking is going to fix it. Clean it, and if it still won’t work, then go buy the replacement.
How do I know if I've got the right model number so I don't end up with a part that doesn't fit?
Don’t just guess based on the brand name; a Bosch from ten years ago is a different beast entirely from a new one. Open the door and look for a sticker on the side of the inner frame or the top edge. It’ll be a long string of letters and numbers—that’s your model number. If you can’t find it there, check the manual or the back of the machine. Get that number right, and you won’t be stuck with a part that’s just a few millimetres off.
Is there a trick to getting the old arm unclipped without snapping the plastic housing?
Look, those plastic clips get brittle after years of sitting in hot, soapy water. If you just yank it, you’re going to snap the housing and end up needing a whole new assembly. The trick is to use a flat-head screwdriver to gently pry the clip outward while you rotate the arm. Don’t force it. If it feels like it’s fighting you, stop, dry it off, and try again. Patience wins here.
