








You’re probably staring at a puddle on your kitchen floor, wondering if you’ve just signed a death warrant for your appliance. Most people think a machine that won’t drain is a sign it’s time for the tip, but I’ve spent eighteen years in Bristol proving that’s rarely the case. Usually, it’s just a bit of grit or a coin wedged where it shouldn’t be, or perhaps you’ve finally reached the point of learning how to replace a pump on a washing machine before the whole thing becomes a very expensive paperweight. I’ve seen too many perfectly good machines scrapped because someone was too intimidated by a bit of plastic and a few wires to actually look inside.
I’m not going to give you any of that polished, corporate manual nonsense that makes a simple job feel like rocket science. Instead, I’m going to walk you through the real, greasy truth of the job. I’ll show you how to get in there, how to spot the actual fault, and how to swap that pump out without breaking anything else in the process. No hype, no unnecessary jargon—just the straightforward way to get your laundry moving again.
Guide Overview
Tools & Supplies
- Screwdriver (Phillips or Flathead for housing)
- Pliers (Needle-nose or slip-joint for hose clamps)
- Work gloves (To protect hands from sharp metal edges)
- Shallow pan (To catch residual water)
- Replacement drain pump (1 unit)
- Replacement hose clamps (If existing ones are damaged)
Step-by-Step Instructions
- 1. Before you even think about reaching for a screwdriver, you need to cut the power. Don’t just turn it off at the dial; pull the plug right out of the wall. I’ve seen too many people get a nasty shock because they thought a machine was “off” just because the little light wasn’t blinking. While you’re at it, turn the water taps off too. It’s a lot easier to work when you aren’t fighting a sudden indoor flood.
- 2. Now, you’re going to need to get to the guts of the thing. Depending on your model, this usually means tipping the machine onto its back or removing the bottom kick plate. I always keep a thick old towel or a piece of cardboard handy to lay the machine on so you don’t scratch your floor or crack the plastic casing. If you’re working on its back, make sure it’s steady; you don’t want the whole thing toppling over on you.
- 3. Once you can actually see the pump, you’ll notice a couple of thick rubber hoses clamped onto it. These are the lifelines. Use a pair of pliers to squeeze the metal clamps and slide them back a bit. Be ready—as soon as you pull those hoses off, any leftover water trapped in the lines is going to come rushing out. Have a shallow tray or an old bucket sitting right underneath to catch the mess.
- 4. Next, you’ve got to disconnect the electrical plug that goes into the pump motor. It’s usually a small plastic connector. If it looks like it’s been sitting in dampness for years, it might be a bit stiff, so just give it a firm wiggle rather than yanking it. You want to avoid snapping the wires, or you’ll be looking at a much bigger job than just a simple pump swap.
- 5. Now for the actual swap. Most pumps are held in place by a couple of screws or a plastic housing that clips in. Unscrew them carefully and lift the old, dead pump out. Before you put the new one in, I always take a second to look inside the housing for any stray coins, hairpins, or those dreaded rogue socks that might have caused the blockage in the first place. If the old pump is physically cracked or the impeller won’t spin, you’ve definitely found your culprit.
- 6. Slide the new pump into position and make sure it sits flush against the base. If it’s sitting crooked, those hoses won’t seal properly, and you’ll be back to square one with a leak. Reattach the electrical connector and then slide those rubber hoses back onto the ports. Make sure the clamps are seated exactly where they were before—if they slip, you’re going to have a very bad afternoon.
- 7. To finish up, stand the machine back up on its feet and give it a little wobble to make sure it’s level. Plug it back in, turn the water on, and run a short rinse cycle. Don’t just walk away immediately; stay and watch it for the first ten minutes. You want to be absolutely certain that everything is bone dry and that the new pump is humming along without any drama.
Understanding How to Replace a Pump on a Washing Machine
Before you go grabbing a new part, you need to be sure it’s actually the pump that’s bit the dust. I’ve seen plenty of people rush into a full replacement when they really just needed a bit of unclogging washing machine drain lines. Usually, if you’re hearing a loud, rhythmic grinding or if the machine is just sitting there full of stagnant water, you’re looking at a pump issue. However, sometimes it’s just a stray bra wire or a rogue coin wedged in the impeller. If you can hear the motor trying to turn but it sounds like it’s struggling through gravel, that’s your cue to start drain pump motor troubleshooting before you commit to buying anything.
When you finally get to the job, don’t expect to do it with just a butter knife. You’ll want a decent set of drain pump replacement tools, specifically some long-reach pliers and a proper screwdriver set, because these machines aren’t exactly designed for easy access. Once you start accessing washing machine internal components, keep an eye on those rubber hoses. They get stiff and brittle over time, and if you pull too hard, you’ll be dealing with a leak on top of a dead pump.
Key Things to Know
Before you start unscrewing anything, you need to be sure it’s actually the pump and not just a stray sock or a rogue coin. I’ve spent half my career unclogging washing machine drains only to find a bra wire or a handful of bobby pins jammed right in the impeller. If you’re hearing a loud, grinding noise or the machine is refusing to empty, do a quick bit of drain pump motor troubleshooting first. Check if the impeller spins freely by hand (once you’ve drained the water, obviously) before you go buying parts.
When you do get down to business, don’t expect to find a neat little toolkit waiting for you. You’ll likely need a decent set of Torx drivers and some long-reach pliers for accessing washing machine internal components that like to hide behind the drum. My biggest piece of advice? Take a photo at every single stage. I’ve seen plenty of DIYers get halfway through a job only to realize they’ve put a wire loom in a position that’ll pinch the next time the machine spins. Keep it tidy, or you’ll be paying a professional to fix your “fix.”
A Few Bits of Advice Before You Get Your Hands Dirty
- Don’t just yank the old hoses off. If there’s a bit of standing water left in the system, it’ll come flooding out the second you loosen that clip, and trust me, you don’t want a puddle on your kitchen floor.
- Keep an eye on those little spring clips. They’re easy to lose, and if you drop one down the back of the machine or into the guts of the unit, you’ll be wishing you’d had a magnet handy.
- Check the hoses themselves while you’ve got the machine apart. If the pump died because a hose was perished or blocked with a stray coin, putting a brand new pump on a dodgy hose is just a waste of your time.
- Make sure you’ve got the right part before you start tearing things apart. I’ve seen plenty of people order a pump based on the machine model, only to find the manufacturer changed the internal fittings halfway through the production run.
- When you’re tightening everything back up, don’t go overboard. You want a good, firm seal, but if you manhandle the plastic connections, you’ll just crack them and end up right back where you started.
The Bottom Line
Don’t go buying a new machine just because it won’t drain; nine times out of ten, it’s just a dead pump or a bit of grit in the way.
Before you start unscrewing things, make sure you’ve actually got the right part in your hand, because even if they look identical, a few millimetres make all the difference.
Keep your workspace tidy and your tools close, because once you’ve got a machine stripped open, the last thing you want to be doing is hunting for a screwdriver under the sofa.
Getting Back to Business
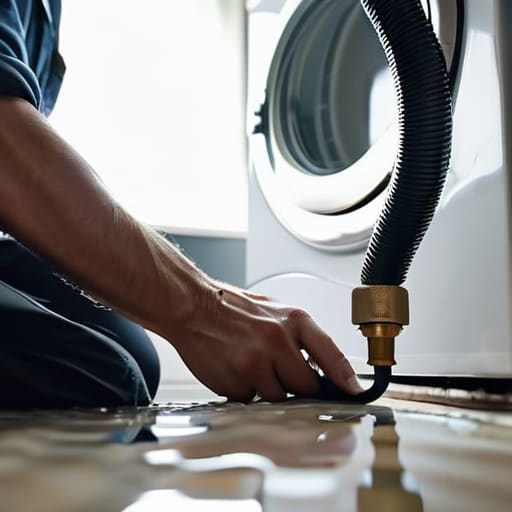
Once you’ve got that new pump seated properly and the hoses are clamped tight, you’re mostly home and dry. Just don’t go rushing off to start a heavy load immediately; give it a quick test cycle on a short spin to make sure there isn’t a tiny drip hiding somewhere in the connections. Remember, it’s usually the little things—a loose clip or a bit of grit in the seal—that cause the most grief. If you’ve kept your workspace tidy and double-checked those electrical connections, you’ve done the hard part. Most of the time, it’s just a matter of staying methodical and not rushing the final tighten.
It’s a bit of a shame, really, how many people see a puddle and think the whole machine is destined for the tip. I’ve spent eighteen years seeing perfectly good appliances tossed out just because someone didn’t want to get their hands a bit greasy. But you? You’ve actually taken the time to look under the hood. There is a real, quiet satisfaction in fixing something yourself instead of just clicking ‘buy now’ on a replacement. You’ve saved a bit of money, saved a load of plastic from a landfill, and proved that most things aren’t actually broken—they just need a bit of attention.
Frequently Asked Questions
Do I really need to buy the exact same model part, or can I use a universal pump?
Look, I’ve seen people try to force a universal pump into a machine it wasn’t meant for, and it’s never a good time. If you can find the exact part for your model, do it. It’ll click in, the hoses will line up, and you won’t be fighting it for an hour. Universal pumps are a gamble; sometimes they work, but often you’re just trading a broken machine for a leaking one.
How do I know if it's actually a dead pump or if there's just something stuck in the impeller?
Before you go ordering a new part, check the impeller. I’ve seen it a thousand times: a stray bra wire or a rogue coin wedged in there, making the motor sound like it’s dying when it’s actually just struggling. Pop the filter out and give the little plastic blades a flick with your finger. If they spin freely without a grinding noise, your pump’s fine—you’ve just got a blockage. If it’s jammed solid, then we talk replacements.
If I find a bit of loose change or a hairclip in the old pump, does that mean I've definitely found the culprit?
It’s a massive clue, but don’t go buying a new pump just yet. If you find a hairclip jammed in the impeller, you’ve found your culprit. But if it’s just a loose fifty-p piece rattling around the housing, the pump itself might still be perfectly fine. Clear out the debris, give the impeller a manual spin to make sure it isn’t seized, and see if it clears. Sometimes it’s just a bit of grit, not a death sentence.
