









I spent twenty years pulling lint out of dryer vents and stubborn hair from washing machine pumps, so I’ve developed a bit of a nose for things that are unnecessarily complicated. Most people think they need to spend a fortune on designer fixtures or smart-home systems to figure out how to light a room properly, but honestly, that’s mostly marketing nonsense. I’ve seen more “high-end” setups fail because they relied on one single, aggressive overhead bulb that makes your living room look like an interrogation chamber. It’s like trying to run a dishwasher with a blocked drain; it doesn’t matter how shiny the front is if the internal mechanics are a mess.
I’m not here to sell you on expensive trends or complicated electrical schematics. My goal is to give you the same straightforward, no-nonsense approach I use when I’m stripping down a vacuum cleaner to find the actual problem. I’ll show you how to layer your light using basic principles that actually work, ensuring you aren’t squinting in corners or blinding yourself every time you flip a switch. We’re going to focus on practicality over prestige, getting your space bright enough to actually live in without breaking the bank.
The Technicians Blueprint How to Light a Room Properly
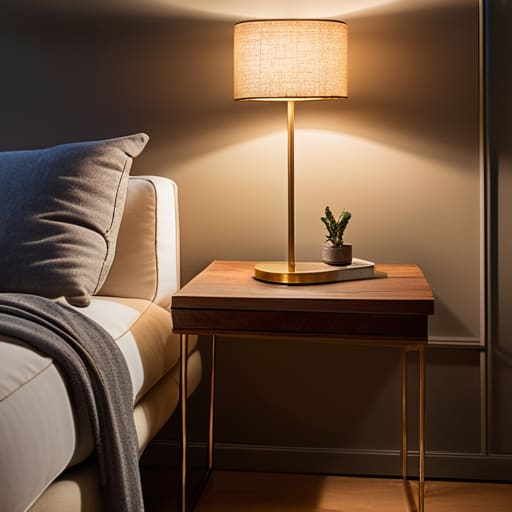
When I’m elbow-deep in a washing machine, I don’t need a dramatic spotlight; I need to see the tiny bit of grit stuck in the pump. Most people treat their living room the same way, but they make the mistake of relying on one big, glaring bulb in the middle of the ceiling. That’s not lighting; that’s an interrogation. To do it right, you need to understand ambient lighting vs task lighting. You want a soft base layer to fill the room so you aren’t tripping over the cat, but you also need focused light for when you’re actually doing something, like reading or fixing a leaky tap.
I always tell people to think in layers. If you just have one source, your eyes will get tired, much like trying to work on a circuit board in a dim garage. By using layered lighting techniques, you can bounce light off walls or use floor lamps to fill those awkward, shadowy corners. It’s about creating depth, not just turning on the switch and hoping for the best. If you can, throw in a few dimmers; being able to dial the brightness down is just common sense.
Layered Lighting Techniques Avoiding a Total System Failure

If you try to run a whole house off a single, massive overhead light, you’re essentially trying to power a heavy-duty dryer with a single extension lead. It’s going to blow the circuit, or at least blow your mood. To get it right, you need to understand ambient lighting vs task lighting. Think of ambient light as your base layer—the steady hum of a machine—while task lighting is the focused energy you need for specific jobs, like reading or prepping dinner. Without that distinction, you end up with a room that’s either a dark cave or a surgical theatre.
I’ve spent years looking into the guts of machines, and I can tell you: precision matters. If you want your space to actually feel livable, you need to implement layered lighting techniques that allow you to adjust the intensity. This is where the dimmer switch benefits really come into play. Being able to dial back the brightness when you’re winding down is just as important as having a bright spot to find a dropped screw. It’s about balance, not just brute force.
Ambient Lighting vs Task Lighting Calibrating Your Visual Output

When I’m elbow-deep in a washing machine, I need one thing: clarity. I don’t need a mood piece; I need to see the exact moment a screw hits the floor. That’s the difference between ambient lighting vs task lighting. Ambient light is your base layer—it’s the general glow that keeps you from tripping over the cat. But if you try to read a manual or fix a leaking valve using only that overhead wash, you’re going to end up with a headache and a botched job. You need task lighting—focused, bright, and positioned exactly where the work is happening.
Think of it like a circuit. If you try to run a heavy-duty motor off a tiny, flimsy extension lead, you’re asking for trouble. Similarly, relying on a single source for everything is a recipe for eye strain. I always tell people to look into the dimmer switch benefits too. Being able to dial the brightness up when you’re searching for a dropped washer, or down when you’re finally sitting down with a cup of tea, makes the whole system much more resilient. It’s about having the right tool for the right moment.
Warm vs Cool Light Bulbs Tuning the Right Frequency
I’ve spent eighteen years staring into the guts of machines, and if there’s one thing I’ve learned, it’s that the wrong component can make a perfectly good system feel like a total failure. Lighting is no different. People often come to me complaining that a room feels “off” or “unwelcoming,” but when they swap the bulbs, the problem vanishes. It usually comes down to the temperature of the light. If you’re using those harsh, blue-tinted bulbs in a living room, you’re essentially trying to run a delicate washing machine cycle on a heavy-duty industrial setting. It’s jarring.
For most living spaces, you want to lean toward the warmer end of the spectrum. Warm vs cool light bulbs isn’t just a technical distinction; it’s about setting the right frequency for your home. I usually suggest warmer tones for areas where you actually want to sit and relax. If you’re working in a kitchen or a workshop, though, you might need that cooler, sharper light to see what you’re doing. Just keep an eye on the color rendering index explained in your bulb’s manual—a higher CRI means the colors in your room will actually look like they’re supposed to, rather than looking washed out and grey.
Mastering Color Rendering Index Explained Precision Without the Glitch
Now, don’t let the technical jargon throw you. When we talk about color rendering index explained, we aren’t talking about some complex circuit board or a faulty capacitor. It’s simpler than that. Think of CRI as the ability of a bulb to show you what things actually look like. I’ve seen people spend a fortune on fancy fixtures only to realize their living room looks like a sickly grey hospital ward because they bought cheap, low-CRI bulbs. If the index is low, your red cushions will look brown and your skin will look washed out.
It’s a lot like testing a motor; if the input is rubbish, the output won’t be either. If you want your home to feel lived-in rather than clinical, you need a high CRI—aim for 90 or above if you can. It’s one of those small, overlooked details that makes the difference between a room that feels right and one that just feels functional. You wouldn’t try to fix a delicate circuit with a sledgehammer, so don’t try to decorate a room with light that can’t even show you the true color of your own rug.
The Quick Fix: Five Ways to Stop Your Lighting from Failing
- Stop relying on the “big light.” It’s the equivalent of trying to fix a delicate circuit board with a sledgehammer; it just blasts everything with a harsh, flat glare that kills any sense of depth.
- Check your connections—and I don’t just mean the plugs. If you’ve got a flickering bulb, don’t just swap it out immediately. Check the socket and the fixture first; a loose contact is just as annoying as a blocked pump in a washing machine.
- Don’t ignore the shadows. Just like you wouldn’t work on a motor in the dark, you can’t have a functional room if your lighting only hits the center. You need to push light into the corners to stop the room from feeling like it’s shrinking.
- Match the bulb to the job. Putting a bright, clinical daylight bulb in a lounge is like using industrial degreaser to clean a cast iron skillet—it’s overkill and it ruins the finish. Keep the cool tones for the workspace and the warm tones for where you actually sit.
- Watch out for glare on reflective surfaces. If you’ve got a glass coffee table or a polished screen, position your lamps so you aren’t staring directly into a light source every time you sit down. It’s a simple bit of calibration that saves a lot of eye strain.
The Quick Fix Checklist
Stop relying on one big, bright light in the middle of the ceiling; it’s like trying to fix a circuit board with a sledgehammer. You need layers—ambient, task, and accent—to actually see what you’re doing.
Check your bulbs before you commit. If the light feels “off” or makes your living room look like a hospital ward, you’ve likely grabbed a cool temperature when you needed a warm one.
Don’t ignore the CRI (Color Rendering Index). If you want your furniture and walls to look the way they did when you bought them, you need high-quality bulbs that don’t glitch out the colors.
Don't Leave Your Room in the Dark
At the end of the day, lighting a room isn’t about buying the most expensive designer lamps you can find; it’s about understanding how the components work together. You’ve looked at the blueprint, you’ve balanced your ambient and task layers, and you’ve checked your CRI so you aren’t squinting at everything. It’s a lot like troubleshooting a washing machine—if you ignore one small part of the system, the whole thing just doesn’t run right. If you get the frequency of your bulbs wrong or forget to layer your light, you’re basically trying to run a motor with a clogged filter. Keep your layers balanced and your color rendering precise, and you’ll avoid that flat, lifeless feeling that comes from poor setup.
I spent eighteen years pulling junk out of machines that were perfectly fine if someone had just taken five minutes to clean them. Lighting is much the same. Most people think their house feels “gloomy,” but usually, the room isn’t broken; it’s just poorly maintained. Don’t be afraid to tinker with your setup until it clicks. Once you stop relying on that single, harsh overhead bulb and start calibrating your environment properly, you’ll realize that good light is the ultimate repair for a space that feels off. It’s worth the effort to get it right.
Frequently Asked Questions
If I’ve already got the wrong bulbs in my fixtures, do I need to replace the whole lamp or just the glass?
Don’t go throwing the whole lamp in the skip just because the light feels off. That’s like tossing a perfectly good washing machine because the hose is blocked. Most of the time, you just need to swap the bulb. If the shade or the glass itself is the problem—maybe it’s too dark or tinted—replace that. But start with the bulb first. It’s the cheapest part to fix, and usually, it’s all that’s broken.
How do I stop my smart bulbs from flickering like a faulty capacitor every time I dim them?
It’s usually not the bulb itself; it’s the controller. Most smart bulbs are picky about the current they receive. If you’ve got an old-fashioned manual dimmer switch on the wall, it’s likely sending uneven pulses, much like a washing machine motor struggling with a bad capacitor. You can’t dim a digital component with an analog dial. Swap that wall switch for a standard on/off toggle, and the flickering should stop immediately.
Is there a way to check if my lighting setup is actually working without having to sit in the dark and guess?
You don’t need to sit there in the gloom like you’re waiting for a power cut to find out if it’s working. Grab a camera—your phone is fine—and take a few shots. If the shadows look like heavy grease buildup or the corners are pitch black, your coverage is failing. Better yet, use a simple light meter app. It’s just like checking the voltage on a multimeter; it gives you the hard numbers so you aren’t guessing.
