








I’ve lost count of how many times I’ve stood in a customer’s kitchen in Bristol, looking at a puddle of water pooling at the bottom of their fridge, only to realize the machine isn’t actually broken. People see that water and immediately start looking up the cost of a new appliance, but the truth is, cleaning a fridge drain hole is usually all it takes to stop the leak. It’s frustrating because most folks think they need a specialist or a brand-new unit, when really, they just have a bit of debris or some old food gunk blocking the way. I’ve opened more machines than most people will own, and hardly any of them actually needed replacing; they just needed a bit of attention in the right spot.
In this guide, I’m going to show you exactly how to clear that blockage without needing a degree in engineering or a massive budget. I won’t be giving you any of that over-complicated, fancy nonsense; just straightforward, practical steps to get that drain flowing freely again. We’ll go through what tools you actually need—and more importantly, what you don’t—so you can get back to your day.
Guide Overview
Tools & Supplies
- Pipe cleaner or flexible brush for scrubbing the drain
- Turkey baster or large syringe for flushing water
- Warm water 1-2 cups
- White vinegar 1/2 cup
Step-by-Step Instructions
- 1. First things first, you’ll need to clear out the bottom shelf where the drain hole is located. I’ve seen too many people try to work around a jar of pickles or a carton of milk, and it’s a recipe for a spill. Move everything to a cooler bag or just clear the space so you have a proper workspace to move in.
- 2. Locate the drain hole itself. It’s usually a small opening at the back of the fridge, often tucked near the bottom of the rear wall. If you can’t see it, don’t panic; sometimes a bit of frost or a stray bit of lettuce debris is hiding the entrance. Use a torch if you need to, because those fridge corners can be dark as a coal mine.
- 3. Now, you’re going to need a bit of something flexible to clear the blockage. I don’t recommend using a metal coat hanger—you’ll end up puncturing the evaporator or scratching the plastic, and then we’ve got a bigger problem. A piece of flexible plastic tubing or even a long, bendy straw works much better for nudging things loose without causing damage.
- 4. Once you’ve poked around and felt for the clog, it’s time to flush it out. Mix a bit of warm water with a teaspoon of mild dish soap. Don’t go using heavy bleach or anything caustic; you don’t want that residue anywhere near your food. Use a turkey baster or a small squeeze bottle to slowly drip the solution directly into the hole. You’ll know it’s working when you hear the water trickling down the drain line at the back.
- 5. If the water isn’t moving, you might have a stubborn bit of mould or slime stuck in there. Give it another go with the warm soapy water, but be patient. I’ve spent many an afternoon waiting on a clog to give way, and rushing it is how you end up making a mess. Just keep applying small amounts of liquid until the path is clear.
- 6. Once the water is flowing freely, give the hole one final rinse with plain, lukewarm water. This ensures you haven’t left any soapy residue behind that might attract more grime later. It’s a bit like cleaning out a sink; you want to make sure the entire line is rinsed clean from top to bottom.
- 7. Finally, take a dry cloth and wipe down the area around the hole to catch any drips. Before you put all your groceries back in, check the drain pan at the very bottom (usually behind the kickplate at the floor level) to make sure the water is actually reaching it. If it’s sitting there where it should be, you’ve successfully saved your fridge from a very expensive repair bill.
Understanding Cleaning a Fridge Drain Hole
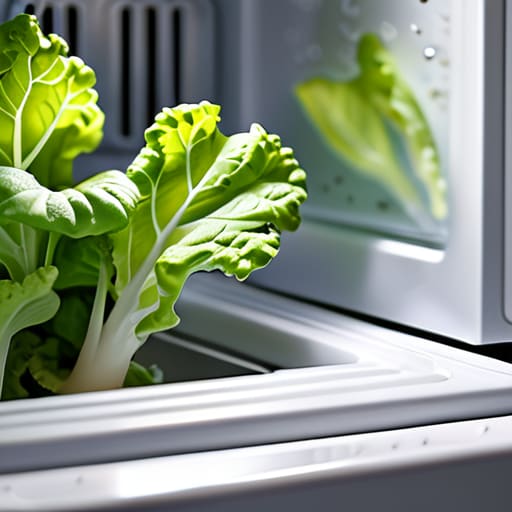
The thing about these machines is that they aren’t actually “broken” in the way most people think. When you see a puddle at the bottom of your crisper drawer, it’s rarely a mechanical failure; it’s just physics. Food particles, bits of lettuce, or even just a bit of spilled milk find their way into that tiny little trough, and before you know it, you’ve got a blockage. I’ve seen so many people call me out for a “dead fridge” when all they really needed was some clogged defrost drain cleaning to get things moving again.
If you want to do this right without making a massive mess, my go-to method is using a turkey baster for fridge drain clearance. It sounds a bit silly, but it’s much more effective than poking around with a straw or a wire, which can easily puncture the plastic. Once you’ve cleared the physical debris, a bit of cleaning fridge drain with warm water helps flush out the remaining gunk. It’s a simple bit of maintenance, but if you ignore it, you’re just inviting a much bigger headache down the line.
Key Things to Know
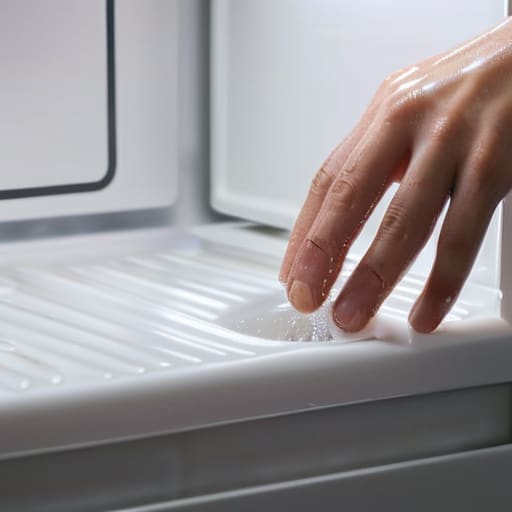
Before you get stuck in, there are a few things I’ve learned from eighteen years of looking at the backside of these machines. First off, don’t go poking around with anything sharp like a screwdriver or a knitting needle. I’ve seen plenty of people accidentally puncture the plastic liner or damage the internal tubing, and suddenly a simple clog becomes a much more expensive headache. If you’re struggling with a stubborn blockage, using a turkey baster for fridge drain clearing is much safer. It gives you enough pressure to push the gunk through without the risk of cracking the housing.
Another thing to keep in mind is that a little bit of maintenance goes a long way in preventing refrigerator condensation issues down the line. Most of the time, it’s just a bit of spilled juice or some stray bits of food that have gone to seed. I usually recommend cleaning fridge drain with warm water mixed with a tiny drop of mild dish soap. It’s more effective than just plain water and helps break down the organic film that causes those nasty smells. Just be patient with it; it’s not a race.
A few things I’ve learned from years of looking at muck
- Don’t go poking around with anything sharp like a knife or a screwdriver; you’ll end up puncturing the plastic or, worse, the cooling lines, and then you’ve got a much bigger bill on your hands.
- A simple piece of flexible tubing or even a bit of thick florist wire with a soft cloth wrapped around the end works much better than trying to force something through.
- If the water isn’t budging, a little warm water mixed with a drop of mild dish soap is usually enough to melt through the grime without causing a chemical mess.
- Keep an eye out for any stray bits of food or even a rogue piece of plastic packaging that might have fallen in there; it’s usually just a bit of debris acting like a plug.
- Once you’ve cleared it, give it a quick flush with clean water just to make sure nothing you’ve loosened is sitting right at the entrance waiting to clog it up again.
The Bottom Line
Most of the time, you aren’t looking at a broken fridge, just a bit of debris or a stray bit of food blocking the path.
Don’t go buying a new appliance just because there’s a puddle at the bottom; a bit of warm water and a steady hand usually do the trick.
If you clear the hole and the water stays put, you’ve likely got a deeper issue, but nine times out of ten, a simple clean is all it needs.
Don't Let a Little Gunk Win
At the end of the day, it really isn’t rocket science. You’ve cleared the debris, flushed the line with a bit of warm water, and made sure that nothing is sitting there waiting to cause a puddle on your kitchen floor. Most people would see a bit of standing water or a funky smell and think the whole fridge is on its way to the tip, but you now know better. It’s usually just a bit of sludge or a stray bit of food blocking the way. By taking ten minutes to clear that drain hole now, you’ve saved yourself the headache of a much bigger repair job—or a brand new appliance—down the line.
I’ve spent eighteen years pulling machines apart, and I can tell you that the most expensive mistakes are almost always the ones that could have been fixed with a bit of patience and a bit of cleaning. We live in a world where people think you have to bin something the moment it acts up, but there is a real satisfaction in knowing you kept it running yourself. Don’t be intimidated by the machine; it’s just a collection of parts, and most of them are quite simple once you get under the hood. Give it a little bit of care, and it’ll keep serving you well for years.
Frequently Asked Questions
Is it safe to use a wire coat hanger to poke through the clog, or am I going to puncture something?
I wouldn’t risk it. I’ve seen too many people go in there with a wire hanger, only to end up with a puncture in the evaporator or a sliced-up drain line. Once you’ve poked a hole in the plastic or the cooling element, you’re looking at a much more expensive repair than a bit of cleaning. Grab a piece of flexible plastic tubing or even a pipe cleaner instead. It’s much gentler on the internals.
How do I know if the drain is actually clear or if the blockage is deeper inside the internal piping?
If you’ve cleared the hole and poured a bit of warm water down, but it still pools up or refuses to budge, the blockage is deeper in the line. I’ve seen it a hundred times. If the water doesn’t disappear into the drain within a minute or two, you’re likely dealing with something stuck further back in the internal piping, probably some old gunk or a bit of debris that’s moved past your reach.
If I find mold growing around the drain hole, do I need to replace the part or is a bit of bleach enough?
Don’t go ordering a new part just yet; that’s a waste of money. If it’s just mold around the hole, a bit of bleach or even some white vinegar and a pipe cleaner will do the trick. You just need to kill the spores and clear the gunk. Only if the plastic itself is cracked or crumbling should you bother replacing it. Most of the time, it just needs a proper scrub.
