








I’ve spent eighteen years pulling apart washing machines and vacuums in Bristol, and if there’s one thing I’ve learned, it’s that people love to spend money on things they don’t actually need. I see it all the time in the aisles of the local shops—specialist, high-priced “floor miracle” liquids that promise the world but usually just leave a tacky film behind. Most of these fancy products are just a way to charge you extra for scented water. If you’re struggling with cleaning hard floors without streaks, you don’t need a chemistry degree or a cupboard full of expensive bottles; you just need to understand how the surface actually reacts to what you’re putting on it.
I’m not here to sell you a lifestyle or a subscription to some magic spray. I’m just going to tell you what I’ve seen from the business end of a floor buffer and a mop bucket. I’ll show you the proper way to prep your tools and exactly which simple combinations actually work without leaving that annoying, cloudy haze. My goal is to get you through the job quickly so you can get back to your life, knowing your floors are actually clean, not just shiny with residue.
Understanding Cleaning Hard Floors Without Streaks
After eighteen years of pulling lint out of vacuum motors and clearing blockages from washing machine pumps, I’ve learned one thing: most people treat their floors like they treat a clogged drain—they just keep adding more liquid and hope it goes away. But when it comes to cleaning floor surface types, more isn’t always better. If you’re working with laminate, for instance, you aren’t just fighting dirt; you’re fighting the physics of evaporation. If you leave too much moisture sitting there, you’ll end up avoiding water spots on laminate only to face permanent swelling in the seams.
It’s the same logic I use when I’m stripping down a motor. You have to understand the mechanics of what’s happening. On stone or ceramic, the real headache is preventing cloudy residue on tile that builds up like scale in a kettle. That haze usually isn’t “dirt”—it’s just leftover soap that never actually left the surface. If your method relies on a thick, sudsy bucket of water, you’re essentially just painting a thin layer of film over your floor every time you mop.
Key Things to Know
First things first, you’ve got to stop treating every floor like it’s a concrete garage. I’ve seen enough people ruin a perfectly good kitchen because they didn’t bother cleaning floor surface types correctly. If you’re working with laminate, for instance, your biggest enemy isn’t dirt—it’s moisture. Too much water and you’ll find yourself avoiding water spots on laminate becomes a losing battle once the boards start swelling at the seams. It’s a simple mistake, but it’s a costly one.
Then there’s the issue of what you’re actually putting on the ground. People love to grab whatever bright blue liquid is on sale, but that’s often where the trouble starts. If you’re dealing with stone or ceramic, you’re likely preventing cloudy residue on tile by simply using less soap. Most of those “all-purpose” cleaners leave a film that actually attracts more dust. I always tell people that less is more; finding the best cleaning solution for hardwood or tile usually means looking for something that rinses away clean rather than something that promises a “deep shine” through heavy chemicals.
Practical Tips and Steps
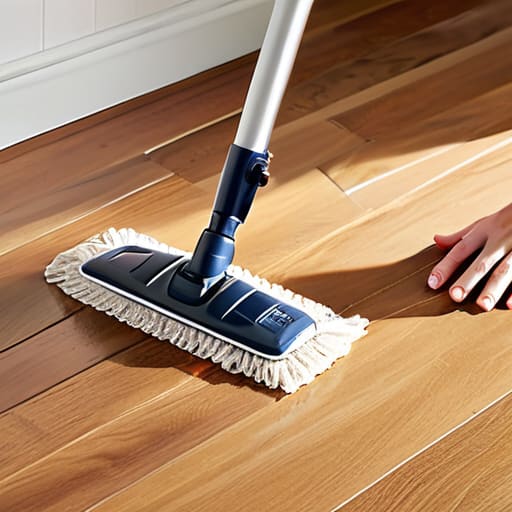
First things first: stop using a bucket of lukewarm water and a heavy mop. I’ve seen enough people ruin their finishes by over-saturating the floor, especially when it comes to avoiding water spots on laminate. If you soak it, you’re asking for trouble. Instead, I always suggest a spray-and-wipe approach. Use a damp—not soaking—microfiber cloth or a spray mop. The microfiber mop effectiveness comes from its ability to lift grit rather than just pushing it around in a muddy slurry, which is usually what causes those annoying streaks in the first place.
When you’re picking your supplies, less is almost always more. If you’re looking for the best cleaning solution for hardwood, don’t go buying some fancy, scented bottled concoction that promises the world. Most of those are full of waxes and polymers that build up over time. If you want to keep things simple, look for a solution with basic natural floor cleaner ingredients like a tiny drop of pH-neutral soap in distilled water. It keeps the surface clear and stops you from fighting a losing battle against cloudy residue.
Common Mistakes to Avoid
The biggest mistake I see is people treating every floor like it’s a bit of old linoleum. If you’re working with wood, using a bucket of soaking wet water is a one-way ticket to warped boards. I’ve seen enough damaged floorboards to know that too much moisture is the enemy. When it comes to avoiding water spots on laminate, you need to be incredibly careful; that material doesn’t breathe like natural stone, and if you leave puddles, you’re going to see those tell-tale marks once it dries.
Another blunder is the “more is better” approach with soap. People think if a little bit of cleaner works, then a whole capful will make it shine. In reality, you’re just building up a layer of film that attracts dirt like a magnet. This is especially common when people are preventing cloudy residue on tile—they use too much product, and instead of a clean floor, they end up with a dull, hazy mess. Stick to the dilution ratios on the bottle. If you’re using a mop, remember that microfiber mop effectiveness relies on being damp, not dripping.
Final Thoughts
At the end of the day, most of the “broken” floors I see aren’t actually damaged; they’re just buried under layers of old soap and neglect. People spend a fortune on fancy gadgets when all they really need is to stop overcomplicating the process. Whether you are preventing cloudy residue on tile or just trying to keep your laminate looking decent, the principle is the same: less is almost always more. If you keep dumping heavy chemicals onto your floor, you aren’t cleaning it—you’re just building up a film that’ll eventually make everything look dull.
I’ve spent eighteen years pulling motors and pumps out of machines, and I can tell you that a machine is only as good as the water and soap you put through it. If you stick to a simple routine and focus on microfiber mop effectiveness rather than buying every new spray bottle on the supermarket shelf, your floors will last much longer. Don’t go looking for a magic fix. Just use the right amount of product, rinse properly, and stop treating your home like a chemistry experiment. It’s not rocket science; it’s just maintenance.
Five ways to stop your mop from making a mess
- Stop using too much soap. I’ve seen enough people pour half a bottle of cleaner into a bucket, and all that does is leave a sticky film that catches every bit of dust the second it dries. Less is more.
- Use hot water, but not boiling. You want it warm enough to cut through the grease, but if you go too hot, you’re just evaporating the cleaner before it’s had a chance to actually lift the dirt.
- Check your mop head. If you’re using an old, grey, crusty mop, you aren’t cleaning; you’re just spreading dirty water around in circles. If it’s seen better days, bin it and get a fresh one.
- Don’t skip the dry mop. This is where most people fail. Once you’ve mopped, go over it with a dry microfiber cloth or a clean mop immediately. If you let it air dry, you’re just inviting streaks to settle in.
- Watch your dilution ratios. If you’re using a machine or a spray, follow the instructions on the bottle. People think more concentrate means a better clean, but it really just means a duller finish.
The Bottom Line
Stop overcomplicating it with fancy chemicals; most of the time, a streak is just leftover soap sitting on your floor because you used too much.
Check your equipment before you start, because a dirty mop or a clogged vacuum filter will just smear the grit around instead of actually lifting it.
If you want a proper finish, use the right amount of water and let the floor do the work of drying itself rather than trying to force it.
One Last Look Before You Put the Mop Away
At the end of the day, getting a streak-free shine isn’t about buying some fancy, overpriced chemical that promises the world; it’s about the basics. You’ve got to use the right solution for your specific floor, keep your mop heads clean, and—most importantly—stop overcomplicating the process with too much water or too much soap. I’ve spent eighteen years pulling apart machines and seeing how much gunk builds up in filters and hoses, and I can tell you that most cleaning failures come down to using too much product or a dirty tool. If you stick to the steps we’ve talked about, you won’t be fighting against a cloudy film every time you finish a bucket.
I know it feels like a chore, especially when you’re staring at a floor that just won’t cooperate, but there’s a real satisfaction in doing a job properly. There’s something about a clean, clear surface that makes a house feel settled. Don’t let a bit of residue or a few stubborn marks discourage you from maintaining what you have. Most things in this life don’t need replacing; they just need a bit of proper, honest maintenance. Take your time, do it right the first time, and you’ll spend much less time re-doing it later.
Frequently Asked Questions
Is it actually worth buying those expensive specialist floor cleaners, or is a bit of dish soap and warm water enough to get the job done?
Look, I’ve spent eighteen years pulling debris out of machine filters, and I can tell you this: more people ruin their floors with “fancy” chemicals than with plain water. If you’re using a tiny bit of dish soap, just don’t overdo it. Too much suds and you’re just spreading a sticky film that attracts more dirt. Honestly? Warm water and a drop of soap is fine, provided you don’t turn your mop into a bubble bath.
If I’ve already gone over the floor and it’s looking cloudy or streaky, is there a way to fix it without having to start the whole scrubbing process from scratch?
Look, don’t panic and don’t go grabbing the heavy scrub brush just yet. If it’s looking cloudy, you’ve likely just left too much residue behind. Grab a bucket of warm water with just a tiny splash of white vinegar—nothing more—and a clean, dry microfiber cloth. Wipe the area down to lift that film, then immediately buff it dry with a fresh cloth. It’s much easier to fix a film than to fix a scratched finish.
How often should I be checking my mop heads or cloths, because I’ve seen enough people just spread old, dirty water around thinking they're actually cleaning?
If you’re using the same cloth for the whole floor, you aren’t cleaning; you’re just painting with filth. I’ve seen enough grime buildup in vacuum canisters to know that if your mop head smells even slightly off, it’s done. Honestly, if you’re using a reusable cloth, wash it after every single session. If it’s a disposable pad, don’t be stingy—swap it out the moment it looks grey. Don’t spread the sludge.
