








Most people think a kettle that’s taking ages to boil or making a racket is on its way to the scrap heap, but they’re usually wrong. I’ve spent eighteen years pulling apart everything from washing machines to vacuums, and I can tell you that a “broken” kettle is almost always just a victim of limescale. Before you go out and spend forty quid on a shiny new model, stop and consider that cleaning a kettle element is usually all it takes to bring it back to life. It’s rarely a mechanical failure; it’s just a bit of crusty buildup playing hide-and-seek with your heating coil.
I’m not going to give you any of that fancy, over-complicated nonsense you see in lifestyle magazines. I’m going to show you exactly how to tackle that scale using stuff you already have in your kitchen cupboard. We’ll go through the proper way to scrub it without damaging the metal, ensuring your next cuppa doesn’t taste like a chemistry experiment. This is about practical, no-nonsense maintenance that keeps your appliances running for years instead of months.
Guide Overview
Tools & Supplies
- Soft sponge or cloth for scrubbing
- Microfiber cloth for drying
- White vinegar or citric acid (1 cup)
- Water (enough to cover element)
Step-by-Step Instructions
- 1. First thing’s first, you need to unplug the kettle. I don’t care if it’s switched off at the wall; if you’re poking around near water and electricity, I want you to be absolutely certain there’s no juice running to it. I’ve seen enough near-misses in my eighteen years to know that caution isn’t a waste of time.
- 2. Empty out any leftover water and take a good look at the bottom. If you see that thick, white, chalky crust clinging to the element, that’s your culprit. It’s just limescale, but it acts like a thermal blanket, stopping the heat from getting into the water and making the machine work twice as hard for half the result.
- 3. Now, don’t go grabbing the steel wool or anything abrasive. You’ll scratched the finish and make it even easier for scale to grab hold next time. Instead, fill the kettle about halfway with a mixture of equal parts water and white vinegar. If you don’t have vinegar, a bit of citric acid powder works just as well, but vinegar is what I keep in my cupboard for this.
- 4. Switch the kettle on and let it boil away. Once it clicks off, leave it alone. Don’t go poking at it immediately; let that acidic solution sit in there for at least thirty minutes. If the scale is particularly stubborn—the kind I see in the machines people toss out because they think the element is “burnt out”—leave it for an hour or two.
- 5. Pour the solution out carefully. You should see the scale flaking off into the liquid. If there are still bits stuck on, take a soft sponge or a cloth and give it a gentle scrub. You’ll be surprised how much of that “broken” element is actually just a bit of calcium that needed a proper soak.
- 6. Rinse it out thoroughly. I mean really rinse it. You don’t want to be tasting vinegar in your morning tea, and you certainly don’t want any leftover grit sitting in the bottom. Run a couple of fresh cycles of plain water through the kettle, letting it boil and draining it each time, until it’s completely clean.
- 7. Give the inside a final wipe with a dry cloth and check the spout and the lid for any lingering bits of scale. Once it’s looking bright again, you’re good to go. It’s a simple job, but it’ll save you from buying a new kettle every couple of years just because you couldn’t be bothered with a bit of vinegar.
Understanding Cleaning a Kettle Element
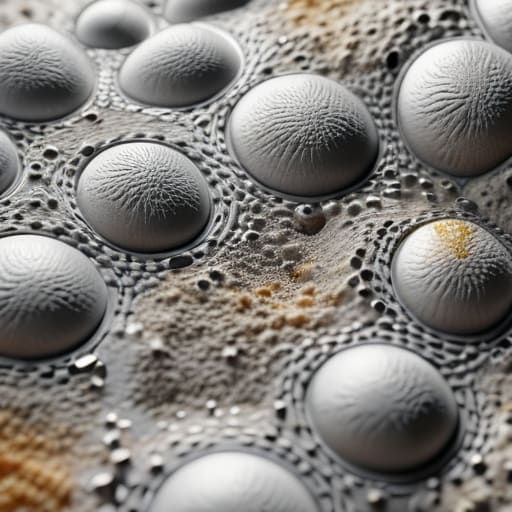
The thing about most people is they see a white, crusty layer on the bottom of their kettle and think the whole thing is knackered. They’ll head straight to the shops for a new one, but after eighteen years of seeing what’s actually inside these appliances, I can tell you it’s rarely a mechanical failure. It’s just chemistry. That white stuff is limescale, and it acts like a thick woolly jumper for your heating element. It forces the machine to work twice as hard to get the water up to temperature, which is exactly how you end up burning out the coil entirely.
If you’re wondering how to clean burnt kettle element residue or just heavy scale, you don’t need fancy industrial chemicals. A simple white vinegar cleaning solution works wonders, though I personally find a bit of citric acid much easier on the nose. The goal isn’t just to make it look shiny again; it’s about preventing mineral buildup before it gets thick enough to cause real damage. If you stay on top of it once a month, you’ll find you aren’t replacing these little machines nearly as often as you think.
Key Things to Know
Before you get stuck in, there are a few things I’ve learned from seeing too many people bin a perfectly good appliance just because it’s acting sluggish. First off, don’t go scrubbing that element with steel wool or anything abrasive. You might think you’re being thorough, but you’ll end up scuffing the protective coating, and once that’s gone, you’re looking at a much faster rate of decay. If you see black marks, you’re likely looking at how to clean burnt kettle element residue, which is usually just carbonized minerals rather than a melted component.
I also find people get a bit precious about the smell of vinegar. If you use a white vinegar cleaning solution, just be prepared to rinse it out three or four times more than you think you need to. If the smell of vinegar puts you off, a decent citric acid kettle cleaner does the exact same job without the pungent kitchen-cloud. Either way, the real trick isn’t just the deep clean; it’s the routine. A quick boil with a bit of acid once a month is the only way to succeed at preventing mineral buildup in kettle units before it turns into a rock-hard crust.
A Few Bits of Wisdom Before You Get Stuck In
- Don’t go scrubbing with steel wool like you’re cleaning a cast iron skillet; you’ll scratch the finish and end up with a kettle that’s prone to leaking or pitting.
- If you see a thick crust of white scale, leave the vinegar or citric acid to do the heavy lifting for at least half an hour rather than trying to chip it away manually.
- Always make sure the kettle is completely dry and unplugged before you start poking around near the base—I’ve seen enough near-misses to know better than to take risks with electricity.
- If you’re using vinegar, don’t expect it to smell like a salad; the fumes are sharp, so crack a window in the kitchen or you’ll be smelling like a pickle for the rest of the afternoon.
- Check the connection points while you’re at it; sometimes it’s not just the scale, but a bit of debris caught in the base that’s making the element struggle to heat properly.
The Bottom Line
Don’t go buying a new kettle just because the water is heating slowly; nine times out of ten, it’s just a layer of limescale acting like a blanket over the element.
A bit of white vinegar or even some citric acid can do more for your appliance than a brand-new replacement ever could.
If you keep on top of the descaling once a month, you’ll stop that crusty buildup before it starts, and you won’t have to spend your Sunday scrubbing it off.
Don't Bin It Just Yet
At the end of the day, it really comes down to a bit of patience and some decent vinegar. You don’t need a degree in electrical engineering or a cupboard full of expensive, specialized chemicals to get that element back to its former glory. Just remember to keep an eye on the scale, give it a proper scrub once the white crust has softened, and for heaven’s sake, rinse it thoroughly so your morning tea doesn’t taste like a science experiment. Most of the time, when people call me out because their kettle is taking ages to boil, it isn’t a blown fuse or a dead heating element; it’s just a thick layer of limescale acting like a thermal blanket and slowing everything down.
I’ve spent eighteen years looking at the guts of household machines, and the biggest lesson I’ve learned is that we are far too quick to treat everything as disposable. We live in a world that wants you to toss a perfectly good kettle into the skip the moment it starts making a bit of noise or taking too long. But there is a real, quiet satisfaction in taking something that felt broken and making it work like new again with nothing more than a bit of elbow grease. Don’t let a bit of mineral buildup convince you that you need to spend more money; just give it a chance and do the work yourself.
Frequently Asked Questions
If I can't see any white flakes in the bottom, does that mean I should leave the element alone?
Not necessarily. If you don’t see white flakes, you might just have a thin, invisible film of limescale that’s already starting to act like an insulator. It makes the element work harder and run hotter than it needs to, which is how they burn out prematurely. If your kettle is taking longer to boil than it used to, give it a quick descale anyway. Better to be proactive than to replace a perfectly good machine.
Is it actually safe to use vinegar, or am I going to end up with a kettle that tastes like a salad dressing?
It’s safe, don’t worry. I’ve seen plenty of people panic about that, but as long as you give it a proper rinse, you won’t be drinking vinaigrette. The vinegar does the heavy lifting on the limescale, then it’s gone. Just boil a couple of fresh jugs of plain water through it afterward to clear the scent. If you’re still worried, use citric acid powder instead—it’s just as effective and much more neutral.
How do I know when the element is actually dead and not just dirty?
Look, I’ve seen plenty of people bin a perfectly good kettle because they thought the element had given up the ghost. If it’s just taking ages to boil or making a lot of noise, it’s almost certainly just scale buildup. But if you switch it on and there’s no heat at all, or you smell something like burning plastic, then it’s likely toasted. If the water stays cold, the element is dead.
