







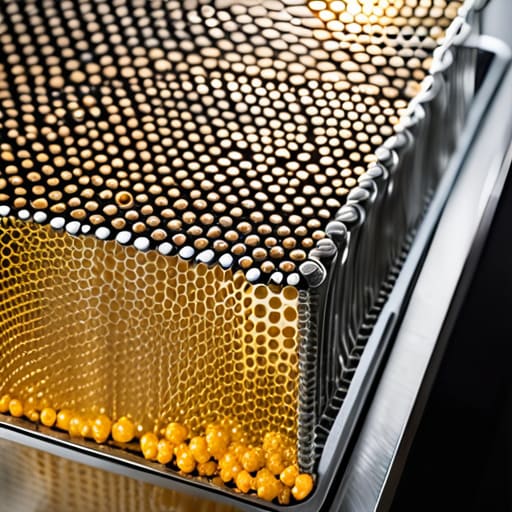

I was elbow-deep in a greasy extractor fan last Tuesday when the homeowner insisted the whole unit was “dead” and needed replacing. I pulled out the metal mesh, and there it was: a thick, orange slab of solidified fat so heavy it had practically choked the motor to a standstill. It’s the same story I’ve seen for eighteen years—people think they need a new appliance when they really just need to learn how to clean a cooker hood filter properly. Most of these machines aren’t actually broken; they’re just suffocating under a layer of old cooking oil that’s been neglected for far too long.
I’m not going to give you a list of expensive, fancy chemical sprays that do more harm than good to the metal. Instead, I’m going to show you the no-nonsense way to strip that grease off using things you likely already have in your kitchen cupboard. We’ll go through the soaking process, the scrubbing technique, and how to tell if your filter is actually salvageable or if it’s finally time to bin it. By the time we’re done, that hood will be pulling air like it’s the day it was installed.
Guide Overview
Tools & Supplies
- Large sink or basin for soaking
- Soft brush or old toothbrush for scrubbing
- Degreasing dish soap or heavy-duty cleaner (approx. 1/4 cup)
- Boiling water (1 large pot)
Step-by-Step Instructions
- 1. First things first, you need to get that filter out of the machine without bending the mesh. Most of them just click into place, but if yours feels stuck, don’t go forcing it with a screwdriver. Give it a gentle wiggle or look for a small little tab you can pull. If you snap the housing, you’re looking at a replacement rather than a cleaning, and that’s a waste of money.
- 2. Once it’s out, take a good look at it. If it’s caked in thick, yellow grease, don’t even bother putting it in the dishwasher yet. A dishwasher is great for a quick rinse, but it won’t touch the heavy-duty buildup that’s actually choking your airflow. You want to start by letting it soak in a sink filled with very hot water and a decent amount of degreasing dish soap.
- 3. If the grease is particularly stubborn—and in my eighteen years, I’ve seen some truly nasty ones—you might need to get a bit more aggressive. I usually recommend a splash of bicarbonate of soda or even a bit of washing up liquid that’s specifically labelled as a degreaser. Let it sit there for at least twenty minutes; you want the chemicals to do the hard work so you don’t have to.
- 4. After the soak, grab an old toothbrush. This is the part people skip, but it’s the most important. You need to scrub the mesh, especially around the edges and the frame where the grease loves to hide. Don’t scrub so hard that you puncture the metal, but you need to make sure every single little hole in that mesh is clear of any oily residue.
- 5. Give the whole thing a final rinse under a stream of hot running water. As you rinse, watch the water run off. If it’s still looking cloudy or feels tacky to the touch, it’s not done yet. You want that metal to feel completely clean and smooth, not slippery.
- 6. Now, don’t go rushing to put it back in while it’s still dripping wet. Lay it out on a tea towel or a bit of kitchen roll and let it air dry completely. If you try to slide a wet filter back into the hood, you’ll just end up trapping moisture against the motor, and that’s how you get damp smells or even electrical issues down the line.
- 7. Once it’s bone dry, slot it back into the hood. Make sure it sits flush and clicks home properly. If it feels loose, you probably haven’t seated it right. A properly fitted filter ensures the fan isn’t working twice as hard as it needs to, which keeps the motor running longer and saves you a service call.
Understanding How to Clean a Cooker Hood Filter
Before you start scrubbing, you need to know what you’re actually dealing with. Most people think a filter is just a bit of dusty metal, but it’s really a complex trap designed to catch microscopic particles. Over time, that’s not just dust; it’s a thick, tacky layer of polymerized fat. If you don’t commit to regular aluminum grease filter maintenance, that oil turns into something resembling industrial glue. Once it hardens, it doesn’t just sit there—it starts to restrict the airflow, which is why you’ll notice your cooker hood suction efficiency dropping significantly. You’ll find yourself turning the fan up to full blast, only to realize the motor is working twice as hard for half the result.
If the grease has already turned into a stubborn, yellow sludge, don’t panic. While some people swear by the baking soda and vinegar cleaning method, I’ve found that for truly heavy-duty jobs, you need a proper degreaser or a very hot soak. Always check your manual first, though; while many modern units have dishwasher safe extractor filters, some of the older, more delicate mesh types can warp if the water is too hot. It’s much better to spend ten minutes cleaning it properly than to replace a warped filter because you were too impatient.
Key Things to Know
One thing I’ve noticed after eighteen years of pulling apart kitchen tech is that people treat these filters like they’re disposable. They aren’t. If you let that yellow, sticky film build up, you aren’t just dealing with a messy kitchen; you’re actively killing your cooker hood suction efficiency. When the mesh gets choked with old fat, the motor has to work twice as hard to pull air through, and that’s how you end up with a burnt-out motor that actually is broken.
Before you go throwing everything into the machine, check the manual. Most people assume all metal mesh is the same, but not all are dishwasher safe extractor filters. Some of the cheaper ones can warp or lose their coating in a high-heat cycle. If you’re dealing with a particularly nasty layer of grime, I usually swear by the baking soda and vinegar cleaning method in a sink full of hot water. It’s much gentler on the metal than a harsh chemical soak, and it’s remarkably good at removing stubborn oil buildup without stripping the finish.
A Few Things I’ve Learned from Too Many Sticky Grills
- Don’t go buying a new one just because it looks disgusting. Most of the time, that thick layer of yellow sludge is just trapped grease that’s waiting for some hot water and a bit of elbow grease to come loose.
- If you’re using the dishwasher, check the manual first. Some of those mesh filters are fine, but if they’ve got plastic bits or certain coatings, the high heat can warp them, and then they won’t sit flush in the hood anymore.
- Use a decent degreaser, but don’t go overboard with the harsh chemicals. You want to melt the fat, not eat through the metal mesh. A soak in hot, soapy water usually does more good than most people realize.
- Watch out for the “hidden” grease. When you pull the filter out, check the area around the housing too. If you leave grease sitting there, it’ll just drip right back into your clean filter the next time you’re frying something.
- Dry them completely before putting them back. I’ve seen people shove damp filters back into the machine, and it just creates this damp, rancid smell that’s a nightmare to get out of the motor housing.
The Bottom Line
Don’t let a greasy filter fool you into thinking the motor’s gone; most of the time, it’s just struggling to breathe through a layer of sludge.
If you’re using a dishwasher to clean them, make sure you’ve degreased the metal first, otherwise you’re just circulating old oil around your plates.
Treat your filters like any other part of the machine—if you neglect the small, cheap bits, you’ll end up replacing the whole expensive unit.
Don't Bin It Just Yet
At the end of the day, cleaning that filter is about more than just stopping your kitchen from smelling like last night’s fry-up. It’s about preventing that grease from migrating into the motor and causing a properly expensive breakdown. If you’ve followed the steps—soaking it properly, getting rid of the heavy sludge, and making sure it’s bone-dry before you pop it back in—you’ve done more for your appliance than most people do in a lifetime. Remember, a bit of hot water and some decent degreaser can save you from having to buy a whole new unit just because the airflow got choked up. It’s a simple bit of maintenance that keeps the whole system breathing.
I’ve spent eighteen years looking at machines that people have written off as “dead,” only to find they were just neglected. Most of the time, a machine isn’t broken; it’s just suffocating. There is a real satisfaction in taking something that looks grim and making it run like it did the day it left the factory. Don’t be part of the crowd that throws things away the moment they get a bit grubby. Take the ten minutes to do it right, and you’ll find that most things are worth saving if you’re just willing to get your hands a little dirty.
Frequently Asked Questions
My filter looks a bit bent or won't sit flush in the frame anymore; is it actually ruined or can I still use it?
Look, I’ve seen plenty of filters that look like they’ve been through a war zone, but a bend doesn’t always mean it’s scrap. If the mesh is still intact and it’s just a bit of the frame that’s warped, you can usually coax it back into place with a bit of patience and some pliers. Just don’t force it. If it won’t sit flush, you’re just letting grease bypass the filter and gunk up your motor.
I've tried the boiling water trick and it's still feeling sticky, do I need to get into the heavy-duty chemicals?
Don’t go grabbing the heavy-duty industrial stuff just yet; you’ll end up stripping the finish off the mesh. If boiling water didn’t budge it, the grease has likely polymerised—it’s turned into a sort of plastic coating. Try a soak in a decent degreaser or even a bit of washing-up liquid mixed with bicarbonate of soda. Let it sit for an hour. If that fails, then we talk chemicals, but let’s not be hasty.
How often am I actually supposed to be doing this before the motor starts struggling?
If you’re a heavy cook—think frying things or using a lot of oil—you ought to be looking at those filters once a month. If you’re more of a boil-the-pasta person, every three months is fine. Honestly, don’t wait for the motor to start whining or struggling; by then, you’re forcing it to work twice as hard through a layer of sludge. Clean them before they get heavy. It’s just common sense.
