









I’ve lost count of how many times I’ve seen a perfectly good kitchen counter cluttered with “dead” appliances that were actually just waiting for a bit of common sense. People see a blender that won’t spin and immediately think the motor has burnt out, so they head straight for the shopping websites to spend a hundred quid on a replacement. They don’t even stop to ask how to test a blender properly before they bin it. Most of the time, it isn’t a dead motor at all; it’s just a bit of grit in the coupling or a tripped thermal cut-out that’s being a stubborn nuisance.
I’m not here to give you a lecture or a manual full of manufacturer jargon that makes your head spin. Instead, I’m going to show you exactly how I do it when I’m standing in a customer’s kitchen in Bristol. I’ll walk you through the simple, tactile ways to tell if you’ve actually got a mechanical failure or if you’re just dealing with a blocked component. My goal is to help you figure out if that machine is worth saving or if it’s truly ready for the scrap heap.
The Ritual of Readiness How to Test a Blender
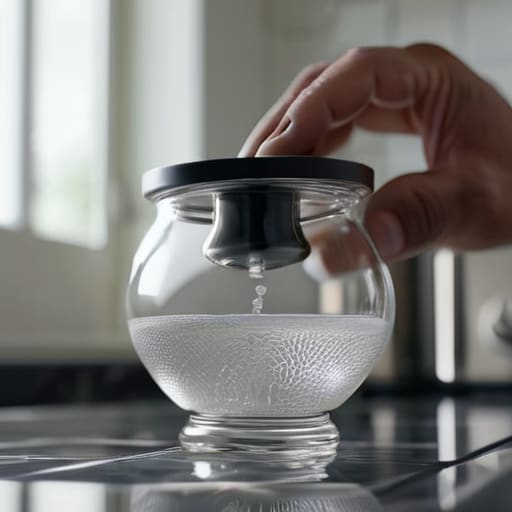
Before you even plug the thing in, you need to do a bit of a walk-around. I always start by checking the base and the jar for any signs of weeping or crusty residue around the bottom. If you aren’t checking blender seal integrity before you start, you’re just asking for a puddle on your kitchen counter. Give the jar a little shake; it shouldn’t rattle like a bag of loose bolts, but it shouldn’t feel fused to the base either.
Once you’ve got the parts lined up, it’s time for the actual test. I never start on the highest speed—that’s a rookie mistake that leads straight to blender overheating prevention issues later on. Start on the lowest setting and listen. You’re looking for a steady, rhythmic hum. If it sounds like someone’s throwing a handful of gravel into a fan, you’ve got a bearing problem or something’s jammed in the assembly. If the motor whines but the blades don’t budge, you’ve likely got a stripped coupling. Listen to the rhythm of the machine; it’ll tell you exactly where the trouble is long before you see any smoke.
The Symphony of Success a Blender Noise Diagnostic Guide

When you flip that switch, you aren’t just listening for noise; you’re listening for a story. A healthy blender should have a consistent, purposeful hum. If you hear a high-pitched screech or a rhythmic grinding, that’s usually the sound of a bearing giving up the ghost. I’ve seen plenty of folks assume the whole unit is toast, but often it’s just a bit of grit in the coupling. This blender noise diagnostic guide is really about learning the difference between a motor working hard and a motor fighting itself.
If the sound is more of a low, labored groan, you might be looking at a different issue altogether. Sometimes it’s not the motor, but the way the load is distributed. If it sounds like it’s struggling even with a light liquid, you should start checking blender seal integrity to ensure you aren’t losing pressure or letting moisture seep into the base. A real professional knows that a machine that sounds “tired” isn’t always broken—it might just be telling you that something is stuck in the works.
Finding the Edge Testing Blender Blade Sharpness
Now, don’t go grabbing the blades with your bare hands like a novice; I’ve seen enough nicked fingers in my time to know better. To really get into testing blender blade sharpness, you want to use a paper towel or a heavy cloth. Run the edge along the paper; if it catches and tears the surface with a clean, sharp rip, you’re golden. If it just slides over or leaves a dull, mushy indentation, those blades have lost their bite. Most people think they need a whole new machine when their smoothies come out chunky, but usually, it’s just the steel that’s gone tired from hitting too many frozen strawberries.
While you’re down there, take a second for checking blender seal integrity too. A dull blade often works twice as hard, which puts unnecessary strain on the drive socket. If you notice the blades wobbling even slightly, it’s not just a sharpness issue—the bearing might be shot. I always tell people: if the blades aren’t cutting cleanly, stop pushing it. You’re just asking for a burnt-out motor.
Mastering Functionality Blender Motor Troubleshooting and Vitality
Once you’ve listened to the noise and checked the blades, you need to look at the heart of the machine. When people call me because their blender “died,” it’s rarely a dead motor; it’s usually just the thermal cut-out doing its job. If your machine shuts off mid-smoothie, don’t go buying a new one just yet. This is a key part of blender motor troubleshooting: the machine is likely just protecting itself from a burnout. I always tell people that blender overheating prevention is mostly about not forcing a motor to fight through a frozen block of ice without enough liquid.
If the motor runs but feels sluggish or smells like something’s frying, you’ve got a different issue. I’ve seen plenty of cases where the coupling—that little bit that connects the motor to the blades—has stripped or worn down. It’s a cheap bit of plastic or metal, but it makes the whole unit feel useless. Before you bin it, how to check blender functionality properly involves watching the base for any wobbles or excessive heat buildup. If the base stays cool but the jar won’t spin, the problem is almost certainly in the connection, not the motor itself.
The Integrity of the Vessel Checking Blender Seal Integrity
You don’t need a degree to spot a leak, but you do need to be observant. When I’m looking at a machine, I’m not just listening to the motor; I’m looking for that tell-tale dried, sugary residue around the base of the jar. If you’ve been checking blender seal integrity, you’ll notice that most “broken” blenders are actually just victims of a perished rubber gasket. Once that ring gets brittle or cracked, liquid finds its way down into the drive socket. That’s a fast track to expensive repairs, or worse, a total motor failure.
I always tell people to do a dry run first, then a wet test. Fill the jar halfway with lukewarm water—not boiling, mind you—and let it sit for ten minutes. If you see even a tiny bead of moisture creeping out from under the blade assembly, the seal is shot. It’s a simple bit of maintenance, but ignoring a weeping gasket is the quickest way to turn a minor fix into a job involving serious blender motor troubleshooting. Keep the seals supple, and the machine will outlive most of the things in your kitchen.
Five Things I Look For Before I Decide It's Scrap
- Check the base for any signs of “the weep.” If you see any dried, crusty residue around the bottom of the jar where it meets the motor, that seal has given up the ghost and it’s only a matter of time before it shorts out the whole unit.
- Don’t just listen to the motor; feel the vibration. A healthy blender should hum with a steady, heavy thrum. If it’s rattling like a tin of loose nails, you’ve likely got a worn-out bearing or a loose blade assembly that’s going to shake itself to pieces.
- The “Smell Test” is underrated. Run it on high for thirty seconds with just a bit of water. If you catch a whiff of something acrid or like burning hair, that motor is struggling against something—either it’s overloaded or the brushes are shot.
- Test the pulse function specifically. A lot of people only check the steady spin, but the pulse is where the real torque shows up. If it stutters or feels weak when you’re trying to crush ice, the motor’s losing its ability to handle a load.
- Inspect the coupling—that little bit where the jar sits on the machine. If the teeth look rounded off or if there’s plastic dust sitting in the groove, the connection is failing. It’s a five-pound fix that most people mistake for a dead motor.
The Bottom Line Before You Bin It
Most “broken” blenders are just choking on something; check your seals and blades before you assume the motor has given up the ghost.
Listen to the rhythm of the machine—a healthy motor has a consistent song, while grinding or stuttering usually means there’s a mechanical blockage or a worn bearing.
Don’t throw away a perfectly good motor just because the jar is leaking; a new seal or a fresh gasket is a lot cheaper than a trip to the shops for a whole new unit.
Don't Bin It Just Yet
At the end of the day, testing a blender isn’t about being a rocket scientist; it’s about listening to what the machine is telling you. You’ve checked the seals for leaks, listened to the motor’s song, and made sure those blades aren’t just spinning aimlessly through mush. Most of the time, when people think their appliance is dead, it’s actually just a minor blockage or a worn-out gasket that’s causing the headache. If you’ve gone through these steps and the motor still feels strong, you’re likely looking at a machine that has plenty of life left in it, provided you treat it with a bit of respect.
I’ve spent nearly two decades pulling machines out of the scrap heap, and I hate seeing a perfectly good motor go to a landfill just because someone didn’t want to spend ten minutes investigating a clog. We live in a world that wants us to just click ‘buy’ on a new one the second something feels a bit off. But there is a real, quiet satisfaction in fixing what you already own. Don’t let a bit of grit or a dull blade convince you that it’s rubbish. Give it a proper look, do the work, and you’ll find that most things aren’t actually broken—they just need a little bit of attention.
Frequently Asked Questions
If the motor smells like it's burning but the blades are still spinning, is it a blown fuse or is the whole unit toast?
If you’re smelling burning but the blades are still turning, it’s rarely a fuse—fuses just stop the power entirely. You’re likely smelling the motor windings overheating or the brushes wearing down. It means the motor is struggling against something, either a mechanical jam or electrical failure. Don’t keep running it; you’ll cook the internals. It’s usually fixable if it’s just the brushes, but if that smell persists, the motor’s likely toast.
I’ve found a bit of grit stuck under the base—can I just clean that out, or does that mean the bearing has gone?
Don’t panic just yet. If it’s just grit under the base, it’s likely just debris from whatever you were blending. Give it a proper scrub with warm, soapy water and a bit of a brush. However, if you run it and hear a grinding sound—like gravel in a gearbox—that’s your bearing crying for help. If it’s just stuck bits, clean it. If it’s making a new noise, the bearing’s likely done.
Is there a way to tell if the coupling is stripped without actually trying to blend something thick?
You don’t need a thick smoothie to find a stripped coupling; you just need your hands and a bit of focus. With the power off, try to turn the drive gear on the base with your finger. If it spins freely or feels “mushy” without any resistance, the teeth are gone. It should feel solid. If it wobbles or feels like it’s slipping even when you apply slight pressure, that’s your culprit right there.
